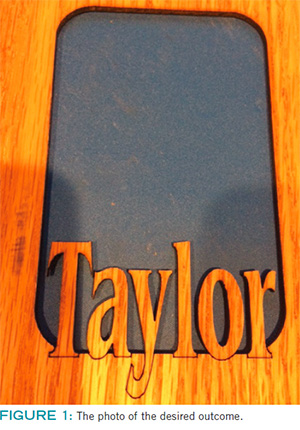
Recently I was contacted by a CorelDRAW user who wanted
to create a unique picture frame with the name of a person
at the bottom. FIGURE 1 is a picture of what was desired.
I’ll go through the steps required to create this type
of artwork in CorelDRAW so that it can be cut/etched on
a laser engraver. Even if you don’t have to create this type
of project or even use a laser engraver, the process can be
transferred to a wide variety of projects.
The Power of Frame Recognition
Harness CorelDRAW’s Tools for an Impressive Gift Item
By FOSTER D. COBURN III, CORELDRAW UNLEASHED
(Originally published in the January 2016 issue of Insights.)
 Recently I was contacted by a CorelDRAW user who wanted
to create a unique picture frame with the name of a person
at the bottom. FIGURE 1 is a picture of what was desired.
I’ll go through the steps required to create this type
of artwork in CorelDRAW so that it can be cut/etched on
a laser engraver. Even if you don’t have to create this type
of project or even use a laser engraver, the process can be
transferred to a wide variety of projects.
Recently I was contacted by a CorelDRAW user who wanted
to create a unique picture frame with the name of a person
at the bottom. FIGURE 1 is a picture of what was desired.
I’ll go through the steps required to create this type
of artwork in CorelDRAW so that it can be cut/etched on
a laser engraver. Even if you don’t have to create this type
of project or even use a laser engraver, the process can be
transferred to a wide variety of projects.
CREATING THE OUTSIDE FRAME
The first steps involve creating the outside dimensions
of the frame and the main cutout in the center. For this
project, I was told the outside dimensions should be 5 in.
by 7 in. and the opening in the middle should be 3 in. by
4.75 in. with rounded corners.
It was quite simple to create the two rectangles needed
at the exact dimensions using the Rectangle Tool in
CorelDRAW and setting the exact dimensions on the
Property Bar. Those of you using older versions of
CorelDRAW will have to be careful about creating the inside
rectangle as you must draw it at the correct dimensions to
get properly rounded corners. Thankfully this isn’t an issue
in CorelDRAW X5 and later, versions that don’t distort
corner roundness. Use either the Shape tool to round the
corners or adjust the values on the Property Bar until the
roundness is just right on the corners.
Once the two parts of the frame have been created,
Combine (Ctrl + L) them to cut the smaller rectangle from
the larger one. Because the lines will be cut with a laser, I gave them a red outline. If your laser requires a different
color, use that color. FIGURE 2 shows our frame so
far. For some of you, this is all you need and the project
is complete. I’ve filled it with a pale blue for illustration
purposes
CREATING THE NAME
Now let’s create the name. Note that the name in the
original photo is used in two ways. The bottom of the
characters slightly overlap the frame. Where they go inside
the area for the photo, they are cut out. Where they overlap
the frame, they are etched.
Regardless of the font selected, it is important to weld the
text to itself so that it is a single object. You can do this
by selecting Arrange | Shaping | Weld. I create my own
shortcut key, assigned to W, so I can do this with a quick
tap on the keyboard. If you have a stray accent (such as
the dot on a lowercase I), you will have to manually draw a
small shape to connect it to the rest of the text and weld it
all together.
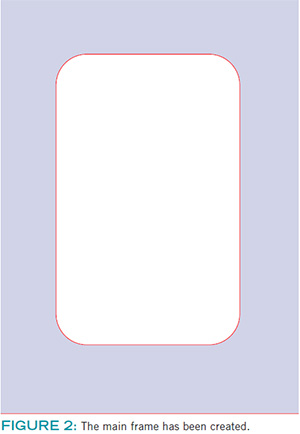
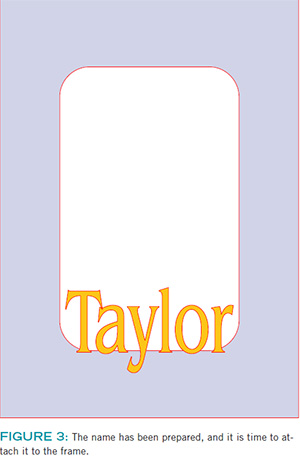
FIGURE 3 shows the name ready to attach to the frame.
I’ve filled the frame with a pale blue and the name with
orange for illustration purposes.
PUTTING THE NAME ON THE FRAME
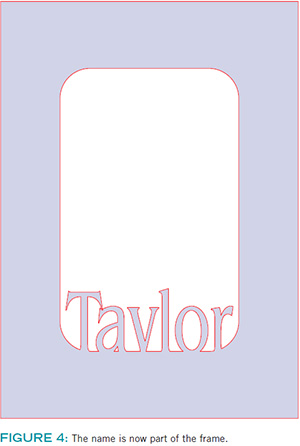
Position the name to create the exact overlap you desire.
Copy it to the clipboard (Ctrl + C). Now select the name and
the frame, and weld them together using the button on the
Property Bar. FIGURE 4 shows the name welded to the
frame. When the weld is complete, paste (Ctrl + V) the copy
of the text back into the drawing. Give the copy of the text a
different outline color that represents the amount of etching
you want. You’ll also want to put it on a different layer so it
can be output separately.
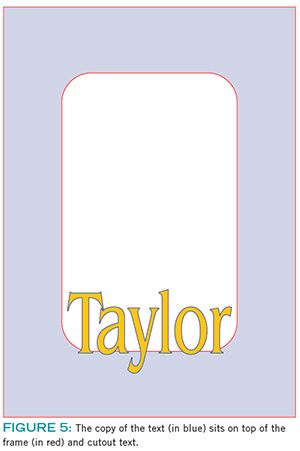
For this example, I’ve outlined the copy of the text in blue.
FIGURE 5 shows the copy of the text overlaying the
frame. Note that you can’t see the text extended from the
edge of the frame because it is behind the overlaid text.
Again, fills were added for illustrative purposes.
OUTPUT THE FILE
This specific project was to be output on a laser cutter/
engraver. Because there are two parts to the projects, there
will be two separate pieces of art sent for output. On one
layer is the frame and text that has been welded together.
It is outlined in red or whatever color is designated for
cutting. Make this layer printable and any other layers
nonprintable and then output the artwork.
Now toggle the layer with the frame and text to nonprintable
and the layer with the copy of the text to printable. This
copy should be outlined with a color that delivers the
appropriate amount of etching. Output this layer.
Once the laser finishes, the piece should be perfect.
BOOLEAN FUNCTIONS
I’ve been telling users for years that the Boolean functions
in CorelDRAW (Weld, Trim, Intersect, and Combine) should
be used in almost every project. This project is yet another
example of artwork that is fairly easy to create using these
powerful features. Typically I find that users either aren’t
sure which feature applies to a given situation or how
to apply the features in the correct order. Practice the
techniques in this article and you’ll soon find that you are
creating the perfect artwork the first time, every time.
Foster D. Coburn III is the author of 13 books
on CorelDRAW, the latest being CorelDRAW
X6 Unleashed. He writes the free Graphics
Unleashed Blog at http://graphics-unleashed.
com and provides fonts, artwork, and add-ons
of interest to CorelDRAW users through the
CorelDRAW Unleashed site at www.
coreldrawunleashed.com. Connect with
Graphics Unleashed on Facebook at
www.facebook.com/graphicsunleashed and follow Foster on Twitter
@fostercoburn and Instagram @fostercoburn.