With gift giving, nothing beats an item that’s been custom-made specifically for you. In that personalized gift market, there are endless items of varying shapes, sizes and functions. While there is something for everyone, different items and materials require specific methods to add the best personalized touch. Machines such as laser engravers or direct printers are ideal pieces of equipment that can be used to decorate a plethora of gifts, but these machines can be quite costly.
How to: Heat Transfer Vinyl for Personalized Gifts
The entry-level decorating process is traditionally used for apparel.
By: Colin Van Lint, sign specialist, JDS Industries Inc.
(Originally printed in the January/February 2024 issue of Insights.)
With gift giving, nothing beats an item that’s been custom-made specifically for you. In that personalized gift market, there are endless items of varying shapes, sizes and functions. While there is something for everyone, different items and materials require specific methods to add the best personalized touch. Machines such as laser engravers or direct printers are ideal pieces of equipment that can be used to decorate a plethora of gifts, but these machines can be quite costly.
In this article, I want to focus on heat transfer vinyl (HTV), which is an entry-level decorating system traditionally used for apparel. HTV is a vinyl attached to a clear carrier sheet that has a heat-activated adhesive on the back side that allows the user to apply it to soft goods such as shirts, hats and bags. There are three essential pieces of equipment that are required to produce and apply HTV:
- Vector design software
- Plotter cutter
- Heat press
HTV Basics
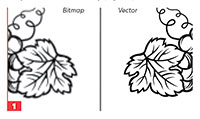 First, you will need design software such as CorelDraw or Adobe Illustrator to format your designs into vector graphics. The key word here is vector; a vector graphic is a type of computer graphic that uses a formula to scale any object to a desired size and maintains its quality. By quality, I mean that no matter how big or small you make the object, it will not get distorted or look fuzzy (Figure 1).
These vector graphics are then used by a plotter cutter, which uses a rotating blade on an XY axis along with the information from the vector file to trace/cut out the design. Plotter cutters come in a variety of sizes, but your standard HTV size is 20 inches or smaller, so it doesn’t require a large, industrial-size plotter.
Once your HTV material has been cut, the next step is to remove the unwanted vinyl from the design, which is referred to as weeding. Once the material is weeded, you can move to the final stage of applying the vinyl to your gift.
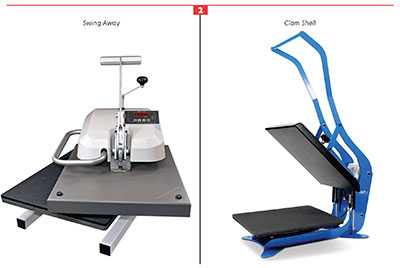
To apply the vinyl, you will need a heat press. Heat presses also come in a variety of sizes and styles. In my opinion, there are two main factors to take into consideration—the first being the size of the heat press. The size of the heat press dictates how big of a design you will be able to apply to your gifts. The second factor has to do with how the press opens and shuts. The two main types of presses on the market are “clam shell” and “swing away.”
Clam shell presses hinge at the back and open like a mouth or clam shell. In contrast, a swing away press opens vertically, straight off the bottom platen, and swings off to the side (Figure 2). The right press will be determined by what you want to press. Personally, I prefer a swing away press. The top heat platen lifting vertically creates a wide gap that allows for thicker materials to be pressed with even pressure. This makes the swing away press more versatile in comparison to the clam shell press, which is more suited for thinner materials like shirts.
Pressed into Action
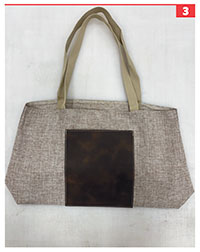
With the basics covered, I want to focus on how to use this process to create unique gifts. As I mentioned before, HTV is traditionally used on shirts, but as long as a product has a soft textile composition and can fit in the heat press, HTV should be a viable option. In this article, I’m going to show how to press on a line of gift items from JDS Industries called laserable leatherettes. This faux-leather product is used to create a plethora of unique gift items. Here, we have a burlap gift bag with a 5-inch square of laserable leatherette (Figure 3).
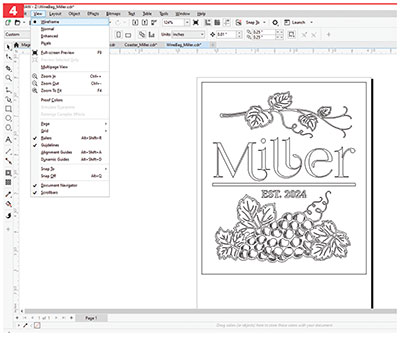
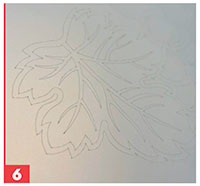
To start, I want to get my artwork set up in the design software; I’m using CorelDraw. I like to look at my artwork in “wireframe” mode. This allows me to check to see if there are any breaks or unwanted lines that may run through the artwork (Figure 4).
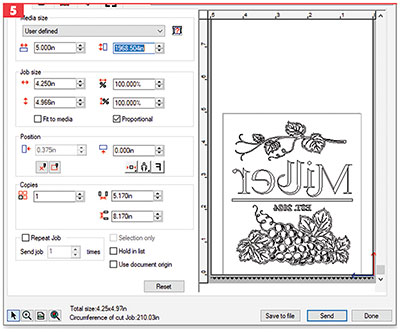
 Once I have my artwork set up, I send my file to my plotter cutter, where the vector design will be cut into my HTV of choice. For this product, I’m using a gold metallic HTV. Notice that the artwork is mirrored (Figure 5) since I’ll be cutting on the backside of the HTV. As I mentioned before, there is a clear plastic carrier sheet that the HTV is attached to from the front side. This allows the vinyl to stay in place as it is transferred over to the press (Figure 6).
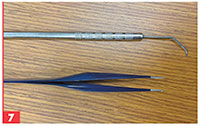
Once the vector graphic is cut, I weed out all the negative space or unwanted vinyl from the design. To do so, I use a weeding pick and a pair of tweezers (Figure 7), which really speeds up the weeding process. Be smart about the design: The more detail in a design, the more weeding will be required (Figure 8).
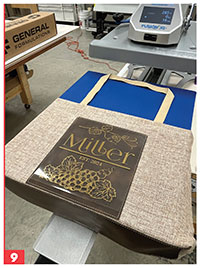
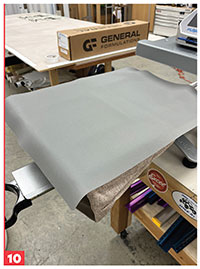
After weeding, you’ll need to press the vinyl onto the gift bag. Notice in the images (Figures 9 and 10) how the bag has been placed in the press. I want the area that is receiving the HTV to be as flat as possible to ensure proper adhesion. Because there are two sides to the bag and two handles, I’m going to dress the bottom platen of my heat press by opening the bag and sliding it on. This eliminates the bottom portion of the bag and handle from getting in the way. I still have the top handle that is inevitably going to be pressed, but it lays flat enough that it doesn’t interfere. I also use a heat-conductive silicone sheet to protect the gift from direct contact with the upper heat platen.

The heat, time and pressure requirements for this vinyl are 285 degrees Fahrenheit for 10 seconds with medium pressure. For this project, I bumped the time up to 15 seconds because I had the added layer from the silicone pad that I needed the heat to penetrate through. After pressing, I let the finished product cool down to room temperature before peeling off the carrier. This requirement pertains to the HTV that I use, but it will differ from HTV to HTV. After everything has cooled down, slowly peel the carrier away. If you notice the vinyl didn’t stick in some areas, you can lay the carrier sheet back down and repress the item. With this gift bag, I noticed the bottom 2 inches didn’t stick well, so I pressed it a second time, just hitting the bottom 2 inches.
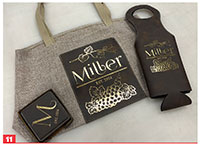 As you can see, we are left with a unique, personalized gift that gives the appearance of a high-end lasered product (Figure 11). The great thing is this product and other products in the laserable leatherette lineup are all done with this same setup and can be combined to create gift packages that you can market to different industries.