In the rapidly evolving landscape of UV direct-to-substrate printing, the advent of UV direct-to-film (DTF) technology has turned heads across the industry. This cutting-edge technique presents a multitude of benefits, making it a great advancement in UV printing—particularly when integrated with existing UV direct-to-substrate printers. While UV DTF and UV direct-to-substrate are distinct printing methodologies, each comes with its own merits. When used together, they provide a comprehensive printing solution that caters to an extensive array of substrates and materials. This synergistic pairing holds particular value for businesses that need diverse printing applications.
How to Integrate UV Direct-to-Film Applications
Tips for creating a more versatile UV printing service.
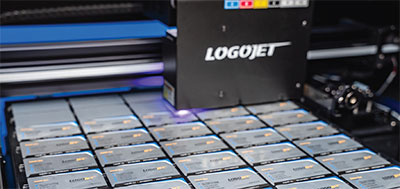
By: Susan Cox, CEO and founder, LogoJET Inc.
(Originally printed in the November/December 2023 issue of Insights.)
In the rapidly evolving landscape of UV direct-to-substrate printing, the advent of UV direct-to-film (DTF) technology has turned heads across the industry. This cutting-edge technique presents a multitude of benefits, making it a great advancement in UV printing—particularly when integrated with existing UV direct-to-substrate printers. While UV DTF and UV direct-to-substrate are distinct printing methodologies, each comes with its own merits. When used together, they provide a comprehensive printing solution that caters to an extensive array of substrates and materials. This synergistic pairing holds particular value for businesses that need diverse printing applications.
 DTF background
First, it’s crucial to distinguish between DTF for apparel and UV DTF, even though both technologies share similarities. While the apparel industry was an early adopter of traditional DTF technology, UV DTF is quickly gaining traction as a formidable alternative.
The traditional DTF method for apparel has multiple steps, beginning with printing a design using water-based ink onto a specialized film. This is followed by applying an adhesive powder and transferring the final design onto fabric via heat transfer.
Conversely, UV DTF designs are printed directly onto a film using UV-curable ink. This printed film is subsequently laminated onto a secondary film. The laminated product can then be manually transferred onto the desired substrate without the need for heat. The process is similar to applying a vinyl decal but with the added advantage of eliminating the meticulous task of weeding out small letters and intricate details.
This distinction clarifies the unique benefits and applications of each technology, setting the stage for UV DTF to become a compelling option in the printing landscape.
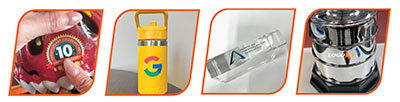
Advantages of UV DTF include the ability to work with odd-shaped items, objects with handles, reflective surfaces and large objects
Advantages of UV DTF
Some of the benefits of UV DTF include:
- Versatility: The process allows you to print on a variety of materials, including some soft materials like synthetic leather and odd-shaped objects, especially large items that do not normally fit into a UV printer.
- Exceptional quality: Using clear gloss ink and specialized lamination techniques results in a finished product that boasts superior color fidelity and luminosity.
- Efficiency: Primarily optimized for small-scale, customized output, UV DTF technology offers scalability for larger production volumes, particularly with sizable items. For instance, if a UV printer can accommodate only four notebooks and the printed logos are small, it could be more time-efficient to print 50 logos on a single UV DTF sheet and manually apply them. This approach can expedite the overall production process.
- Durability: UV inks are engineered to withstand environmental elements like sunlight and moisture. Compared to traditional vinyl decals, the adhesive used in UV DTF films provide superior bonding. Substrate printing typically offers stronger adhesion as it's directly cured onto the surface. In contrast, UV DTF is generally 10%-20% less durable since it relies on adhesive for application. Consequently, UV direct printing is better for items exposed to regular wear or extensive abrasion.
- Less material limitations: Unlike UV direct-to-substrate printing, you’re not limited by the porosity or the need to have products that are consistent and flat.
- Metallic finishes: Authentic gold and silver foils are available to deliver a genuine metallic effect, setting it apart from UV digital printing, which offers only a CMYK approximation of metallic hues.
Pairing UV DTF and UV direct-to-substrate methods can be cost-effective, optimizing operations for different project scales.
Advantages of UV Direct-to-substrate Printing
In this method, the design is printed directly onto the material or substrate itself.
- Speed: This technique is optimal for high-volume, large-scale printing projects, allowing for multitasking efficiency. For instance, you can load a tray with 200 pens and attend to other operational tasks while the printing is underway, thereby maximizing overall productivity.
- Quality: With its high-resolution capabilities and exceptional color accuracy, UV direct-to-substrate printing guarantees remarkable consistency in design placement, ensuring precise and repeatable results within the targeted imprint area. This stands in contrast to UV DTF, which often requires manual application onto the product, potentially affecting the uniformity of the imprint.
- Durability: UV-cured inks are resistant to fading and environmental damage.
- Variable data printing: Direct-to-substrate printing is easier to implement, making it ideal for serial numbers, bar codes or any sort of variable data.
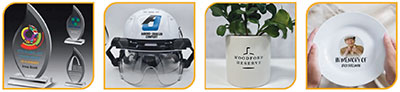
Combining UV DTF and UV direct-to-substrate allows you to work on awards with bases, large objects, reflective crystal, concave items and more.
The Benefits of Pairing
If you already have a UV printer, you can quickly get into the UV DTF game by sourcing the film and laminator. By embracing the two methodologies, you can experience the following benefits:
- Comprehensive solutions: You can offer customers more options for substrates and materials.
- Optimized workflows: UV DTF is ideal for customized, small-scale projects and direct-to-substrate for high-volume runs.
- Quality across the board: Both methods offer high-quality, durable prints, meeting various client needs.
- Economies of scale: Pairing both can be cost-effective, optimizing your operations for different project scales.
- Innovation: The two methods allow your business to stay at the forefront of printing technologies, enhancing your competitive edge.
When evaluating the materials essential for successful DTF printing, there are three key components to ensure a high-quality final product.
- High-quality PET transfer films: Look for films that not only possess durable adhesive properties but also are compatible with UV inks.
- Laminator: Invest in a reliable laminator that delivers consistent pressure. Depending on the type of film you choose, heat lamination may provide superior bonding.
- Clear gloss capability: To achieve the most durable and high-quality transfer, a UV printer equipped with clear gloss functionality is ideal. This feature enhances both the aesthetics and longevity of the printed product.
By carefully selecting these components, you can significantly improve the outcome of your DTF printing projects.
The following is a basic step-by-step guide to get you started with direct-to-substrate projects. Please note that depending on your specific printer model, some settings may require minor adjustments.
Step-by-step Guide
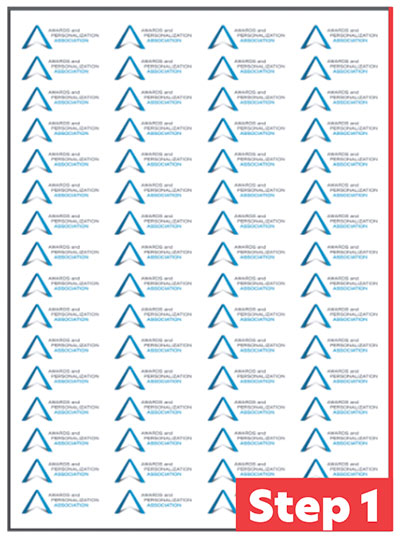 Step 1
Start with an artboard that matches the size of Film A, such as 11.75" by 16.5". Arrange your art file on the Film A sheet using a step-and-repeat layout to maximize material usage. Ensure minimum spacing of 15 millimeters around each logo for adequate cutting room.
Step 2
Place Film A on your print bed, aligning it to the 0,0 starting position. Utilize the vacuum bed feature or a sticky mat to keep the sheet flat.
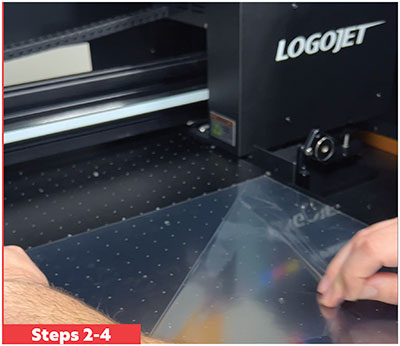 Step 3
Peel off the acetate liner from Film A to expose the adhesive surface, preparing it for printing.
Step 4
Using your UV printer, print your art file on Film A with the adhesive side facing up. Recommended print settings are as follows:
A. (Optional) Clear gloss layer for a robust foundation
B. White ink at 100% opacity
C. Color layer
D. Clear gloss at 100% opacity to seal the logo
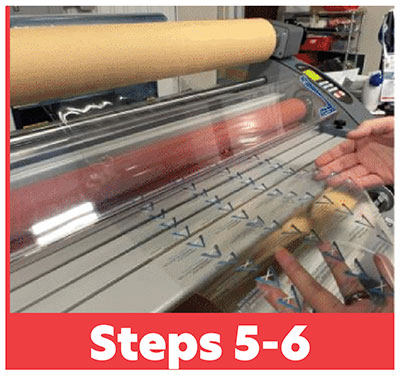
Step 5
Carefully lift the printed Film A and transfer it to your laminator.
Step 6
For thermal laminators, set the temperature to 158° Fahrenheit (70° Celsius), and use the slowest lamination speed. Align Film A with Film B and initiate the lamination process until Film A has fully passed through.
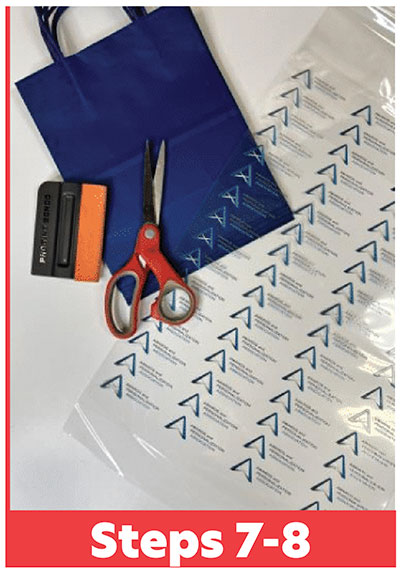
Step 7
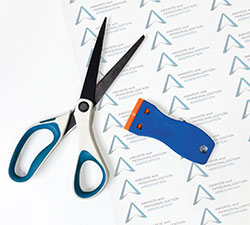
You’ll now have a completed UV DTF sheet featuring both Film A and Film B. Proceed to cut out each logo using a table cutter or scissors.
Step 8
Remove the thin clear acetate layer from Film A. Apply the adhesive side to your product and use a hand applicator squeegee tool to press firmly, eliminating any application bubbles.
Step 9
 Gently peel off Film B at a 45-degree angle. Go slow when peeling. If you notice areas where the design didn’t transfer, reapply the film and press firmly. For stubborn materials, consider using a heat gun to soften the adhesive before attempting to peel again.
Stronger Together
Pairing these two technologies can help you meet a diverse range of customer needs, all while maintaining high quality and efficiency in your operations. Given your focus on customer relationships and innovation, this dual approach could be an excellent strategy.
Understanding this new concept can be challenging. One practical approach is to initially explore online print providers who offer UV DTF as a service. Consider purchasing pre-printed sheets to test compatibility with your products. In any scenario, it’s crucial to rigorously test different materials to determine the most effective solution for both your customers and your in-house printing requirements.
Susan Cox founded LogoJET in 2005. Now headquartered in Lafayette, Louisiana, it has expanded its reach with regional support teams across the U.S., as well as in Toronto, Canada, Bogota, Colombia, and Guadalajara, Mexico. As an early pioneer in UV direct-to-substrate printing, LogoJET has garnered industry accolades for its three-year warranty and five-star customer support.