My wife Lura and I had just finished having dinner with some friends when one of them, Jeff, showed me a feature he had recently discovered on his iPhone.
Tech Competition: Background Removal
A comparison among Corel Photo-Paint, Photoshop and a new iPhone feature
By: Shon Roti
(Originally printed in the November/December 2023 issue of Insights.)
My wife Lura and I had just finished having dinner with some friends when one of them, Jeff, showed me a feature he had recently discovered on his iPhone.
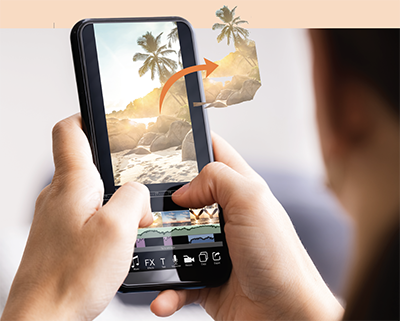 It was the iPhone’s background removal ability. It was quick and good. Really good. And it didn’t even require downloading an app! The software was built into the phone. I found out that an iPhone 8 or later using iOS 16 or higher has this ability.
I was a little shocked. Shocked that this was possible and that I had not heard of it. Previously, to remove a background or the subject from the background of an image, I would have used Photoshop, Corel Photo-Paint or similar graphic design software. This new discovery piqued my interest for sure. I began to wonder just how well this iPhone technology would work against traditional design software.
I do not know what technique the iPhone was using to remove the background. But in order to get close to an apples-to-apples, “one-click fix” comparison, I used the quickest and most appropriate selection tools in Photo-Paint and Photoshop to get the same results. I tested two different images.
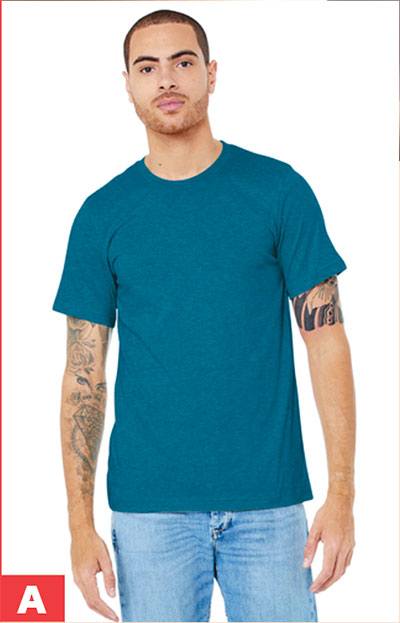
The first image tested would be something typical in my business—an image downloaded from a garment wholesaler to be used in a mock-up for my clients to review (Figure A). The image was 377 x 506 pixels.
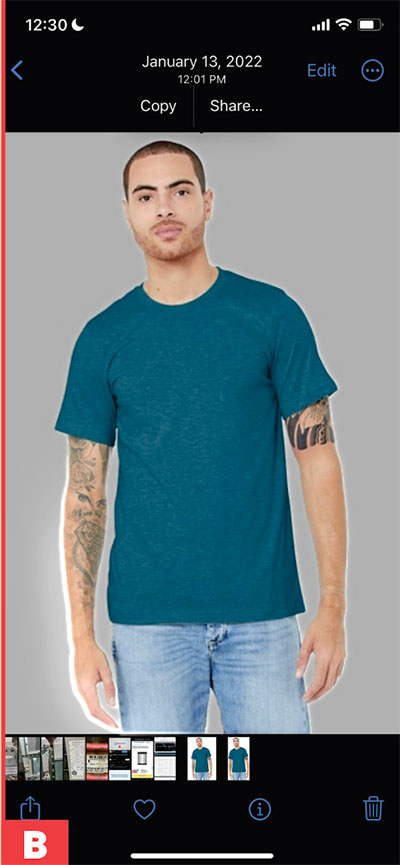
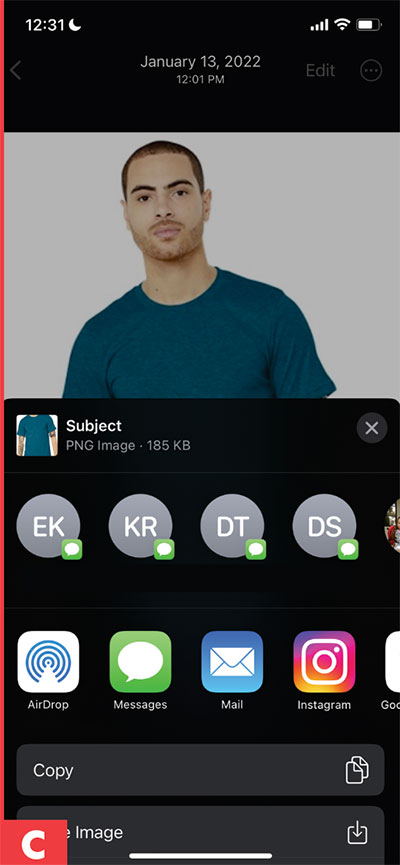
The steps to do this on the iPhone were remarkably simple. To remove the background from an image on the iPhone, do a long press on the image’s subject. The subject will show a “glowing border” when it is ready to be removed. Next, select the “Share” option (Figure B) and then choose the “Mail” option (Figure C). From here, type in an email and send (at the largest file size). This file will be saved as a PNG file with the background removed.
In Photo-Paint or Photoshop, the magic wand tool would be the ideal tool to use due to the stark contrast that exists between the subject and the background. In either software, the wand selects a range of pixels in an image based on the tool’s tolerance setting. Photoshop has a range of 0 to 255, and Photo-Paint has a range of 0 to 100. The high and low end of those ranges effectively selects no pixels or all pixels. The higher the number in the range, the larger the range of similar color pixels will be selected.
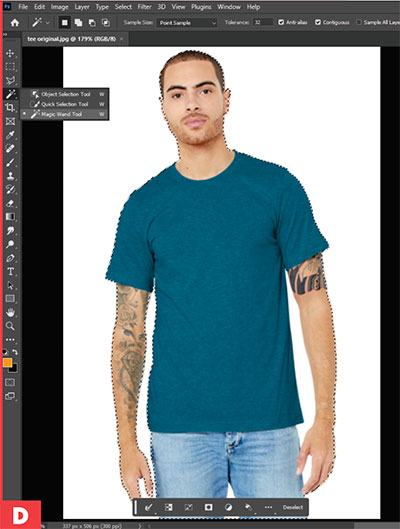
 For Photoshop, I set the tolerance at 32 (the default for Photoshop) with anti-alias turned on (Figure D). I selected the background with the magic wand, inverted the selection, and copied and pasted the image into a new document from the clipboard. In Photo-Paint, the equivalent number for the magic wand is about 13. I duplicated the same steps as I did in Photoshop.
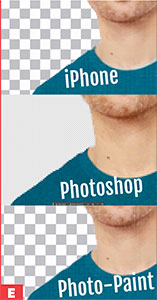
As expected, all three performed well, leaving nothing but the subject, a transparent background and a nice soft edge. A closer look at all three results can be seen in Figure E.
The next image (our family dog, Tulip) was a bit more challenging. Background colors were similar to the dog’s fur (Figure F). Also, fur (or human hair) can be quite challenging for any software or user because the edges are not well-defined, and there are going to be fine details to deal with. This is where I noticed the biggest discrepancies.
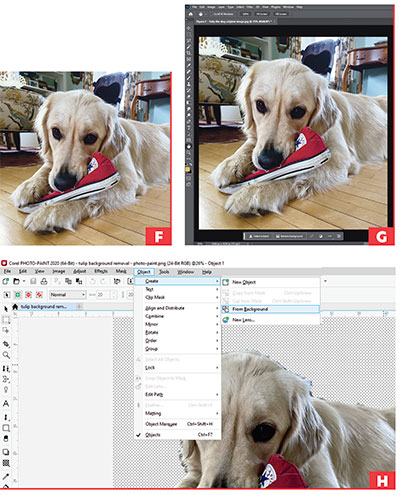
 As before, I used iPhone’s background removal technique with the image of the dog and emailed the image to myself. In Photoshop, the “one-click fix” utilizes the “Remove background” button that appears below the image (Figure G). Once it is finished, the file can be saved as a PNG file.
In Photo-Paint, the quickest, smartest tool is the “Smart selection” tool. To use this, go to Object/Create/From Background. Then use the “Smart selection” tool with
a large brush (nib) to select areas around the subject for removal (Figure H). Press the delete button, and save it as a PNG file.
I tallied the results. The iPhone and Photoshop did remarkably well, but I gave the iPhone (at least in this instance) the win. This was due to the slightly softer faded edge of the subject compared to Photoshop’s results. Again, though, a very close call. Photo-Paint did not fare well in this contest. Edges were jagged and still retained many dark background pixels. And in some areas of a similar color range, the background appeared not to have been touched at all. Also, Photo-Paint’s quickest selection tool required several more steps. Closer image results can be seen in Figure I.
The background removal feature of the iPhone did reduce the file size significantly, but unless the image is going to be used in print, this handicap may not be relevant. Also, this feature can be found on other smartphones, including Androids and Google Pixels.
Background removal is a common task in graphic design, and there are many different effective software solutions and techniques. With the speed of emerging technologies, our tasks will become easier and easier. In my case, staying informed about these new technologies appears to be the most difficult task at hand.
Shon Roti is the owner of 9th Street Designs, a sublimation
and graphic design consulting and promotional products
business. A graphic designer, Shon has spent more than
two decades working as a production artist and instructor
in the awards and promotional products industry. In
2014, APA named him Speaker of the Year. Contact him
at shon@sublimationconsultant.com.