Corporate gifting has long been recognized as a powerful tool for building and nurturing professional relationships. However, in an era brimming with mass-produced, impersonal and forgettable mementos, the significance of a thoughtfully curated gift cannot be overstated. For businesses seeking to express gratitude, strengthen relationships or leave a lasting impression, sandcarving offers a level of elegance and sophistication.
How to Sandcarve Corporate Gifts
Exploring the use of color filling and stage carving to create unforgettable mementos.
Written and photographed by Claire Robbins, marketing, IKONICS Imaging
Award sandcarved by Peter Norman, sales director, IKONICS Imaging
(Originally printed in the September/October 2023 issue of Insights.)
Corporate gifting has long been recognized as a powerful tool for building and nurturing professional relationships. However, in an era brimming with mass-produced, impersonal and forgettable mementos, the significance of a thoughtfully curated gift cannot be overstated. For businesses seeking to express gratitude, strengthen relationships or leave a lasting impression, sandcarving offers a level of elegance and sophistication.
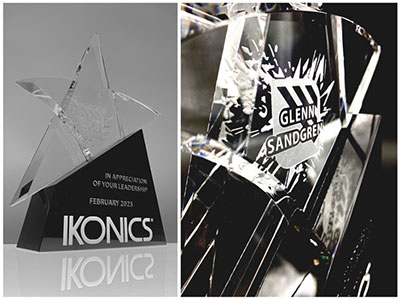
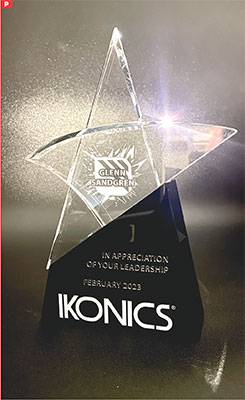
Here, we are sharing a corporate award given to IKONICS’ former CEO Glenn Sandgren for his hard work, dedication and leadership throughout his time with the company.
For this award, we focused on two techniques popular in the sandcarving community: color filling and stage carving, the latter of which gives an appearance exclusive to sandblasting. Color filling is the practice of adding ink or paint to your design after blasting and before the mask is removed. The photoresist mask acts as a barrier for the paint and results in clean, crisp edges without the risk of overfilling. This technique is used for the base of the award to stand out against the black glass. Stage carving is the technique of removing portions of your mask during the blasting process to achieve different depths, or stages, in the carve. This results in a three-dimensional effect when back-blasted.
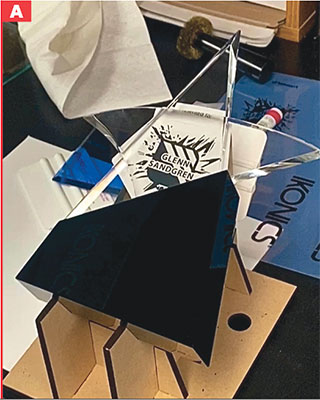
We began with a crystal award blank (Figure A) and printed our planned artwork on regular copy paper. We did this so we could cut out each element of the design, lightly tape them to the substrate, mock-up the final look and check the size and arrangement of each graphic prior
to printing our photo tools. If any part of the design needs to be adjusted digitally, it can be done easily before the photo tool is printed. (Measure twice, cut once mentality.)
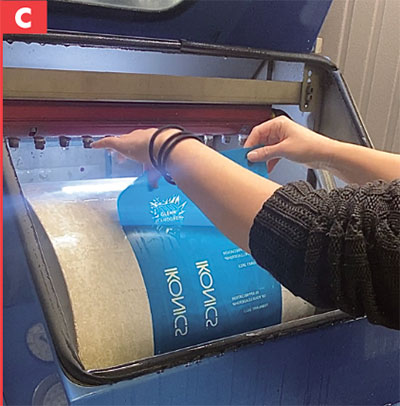
Once you are satisfied with the look of your mock-up, print your photo tools, and prepare to make your photoresist mask (Figure B). We used our IKONICS photoresist washout film (Figure C) and exposed it on our exposure unit. Expose and wash out your photoresist film according to your film’s user guide specifications. Once washed out, allow the film to dry fully before applying the photoresist mask to your substrate.

Before applying your mask, remove any mock-up paper, and clean your surface with an ammonia-free glass cleaner. Cut your mask to size, and place it down on the substrate lightly. Check your positioning before pressing the mask down. If you would like to reposition your mask, simply lift the mask gently and replace it in the desired location. Once you are satisfied with the placement, press down firmly on the mask. We like to use our plastic squeegee to help press the mask down to the surface and push out any large air pockets (Figure D).
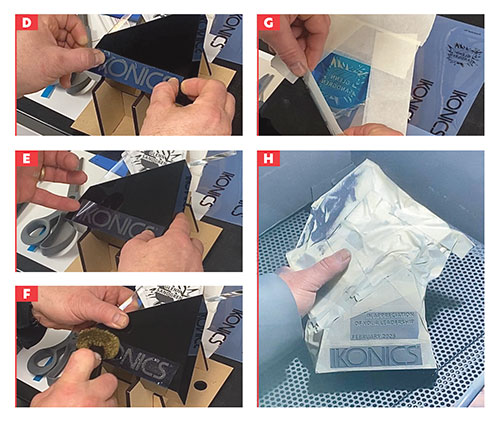
With the mask firmly applied, use the tip of your fingernail to flick the clear carrier sheet up from the corner of the mask, and remove it (Figure E). Roll/rub your wire wheel across the surface of the mask with medium pressure. The goal is to perforate the clear membrane of the mask while pushing down on any leftover air bubbles, allowing that air to escape through the gaps in the now-perforated membrane (Figure F).
After wire-wheeling the full design, apply masking tape (Figure G) to the whole piece, avoiding only where your mask is applied. The aim is to protect all exposed glass and leave only the masked design to be blasted.
Once your piece has been fully masked (Figure H), you are ready to head into the blaster.
Sandblasting
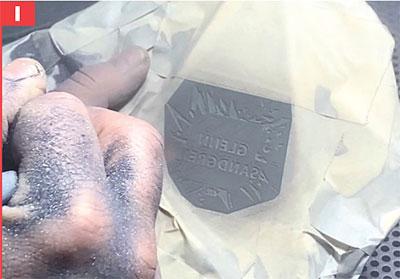
We blasted this award in the IKONICS Imaging CrystalBlast Elite sandcarving unit, using 180 silicon carbide abrasive at about 30-40 PSI. The nozzle was held (Figure I) facing straight on at the substrate, avoiding steep angles that can increase the likelihood of blow-offs. The stream of sand and air is constantly in motion to achieve an even carve across the entire design. Blast until you are satisfied with the depth of your intended technique. For our base, which was color filled, we looked for enough depth to capture the text while also making sure that we weren’t carving so deeply that the paint had trouble drying in a thick enough state for the depth of the carve.
We also were cautious of our depth for the name being back-blasted and stage carved in the center of the star. When stage carving, the initial blasting, or first stage, should have strong and even depth because as you remove areas of resist and blast them, the remaining design is etched deeper into the glass with each stage. This is why it’s important that the first stage is carved the deepest. There can be a fine line between a clearly defined and detailed deep stage carve and losing details in extra stages.
With the initial blasting of our stage carve done, we removed the piece from the sandcarving cabinet and moved it to a well-lit area to remove the next layer of resist (Figures J and K). We used the tip of an X-Acto knife to carefully prick the mask material and peel it up to remove each section that becomes the second stage. When all desired areas are removed, bring the piece back to your cabinet, and give it an even blast over the mask. The depth made here will form a rounded edge on the exposed lines of your design, beginning the three-dimensional effect mentioned earlier.
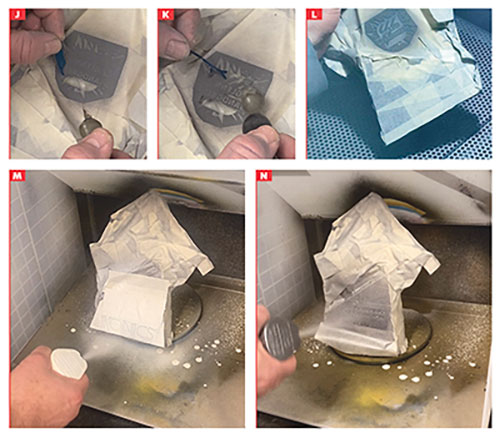
Repeat your blasting and removing of mask areas for each planned stage of the design (Figure L). For this award, we did a simple two-stage carve. However, with thicker glass and attention to detail, a more drastic dimensional look can be achieved with many stages.
With the masking material still adhered to the piece, prepare to color fill. We used a portable tabletop spray booth and Rust-Oleum universal spray paint in a satin finish, though enamel paint pens are also recommended for small color filling projects. We used both white and silver spray paint on the text to make each section stand out (Figures M and N). To protect the other text while painting, we simply covered it with a piece of masking tape.
Final Steps
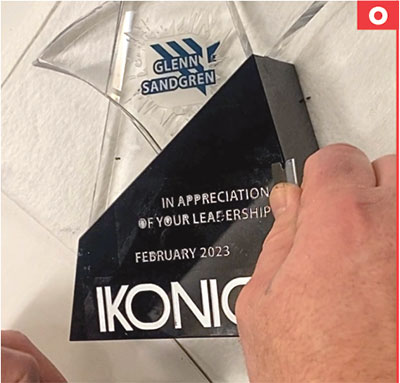
Once the paint has fully dried, you can remove your masking material and clean up your finished piece. The islands of masking material in letters like “P”s and “A”s are sometimes stubborn to remove, and a clean, sharp razor blade can be useful to scrape them off by carefully gliding the blade across the surface (Figure O). Clean off any excess abrasive material, dust or adhesive with a soft damp cloth, and dry.
By embracing sandcarving as a means of personalization, businesses can elevate their corporate gifting abilities to new heights. Each sandcarved gift becomes a tangible symbol of gratitude, achievement and shared values, speaking volumes about the thoughtfulness and care invested by the presenting party (Figure P). Sandcarving allows businesses to demonstrate their commitment to excellence, attention to detail and gratitude for the individuals who contribute to their success.
Read more "How To" articles