Having both a laser engraver and a UV printer allows for some creative experimentation and expanded product offerings. One of the most intriguing techniques has been combining laser engraving and UV printing by using the rotary attachments to combine both machines on a single stainless steel bottle. I have a vast catalog of digital artwork, all created in Photoshop, all with multiple layers. By separating the layers, it’s fairly simple to design a job that incorporates the UV printer and laser engraver together. As long as there are clearly defined layers where one layer can be printed in full color and another laser-engraved in black and white, you are ready to go.
How to: Combine Laser Engraving and UV Printing for Drinkware
Combining the two methods can create a one-of-a-kind product for customers.
By Phil Lewis, LogoJET customer ambassador
(Originally printed in the May/June 2023 issue of Insights.)
Having both a laser engraver and a UV printer allows for some creative experimentation and expanded product offerings. One of the most intriguing techniques has been combining laser engraving and UV printing by using the rotary attachments to combine both machines on a single stainless steel bottle. I have a vast catalog of digital artwork, all created in Photoshop, all with multiple layers. By separating the layers, it’s fairly simple to design a job that incorporates the UV printer and laser engraver together. As long as there are clearly defined layers where one layer can be printed in full color and another laser-engraved in black and white, you are ready to go.
Step 1: Artwork setup
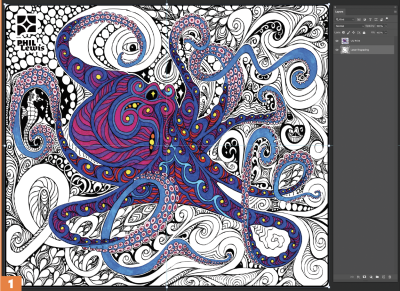
As with all UV printing or laser engraving jobs, the key is in the setup, beginning with the art file. For illustration purposes, we will use this drawing of an octopus in full color (Figure 1), with a background that is black and white.
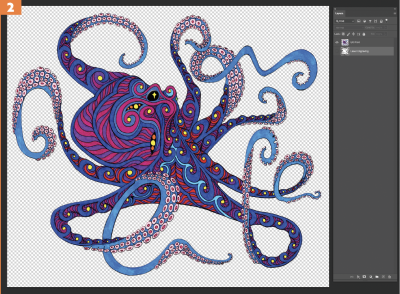
To start, in the Photoshop file, separate the full-color image as its own layer (Figure 2). Next, in the same manner, separate the background as another layer (Figure 3).
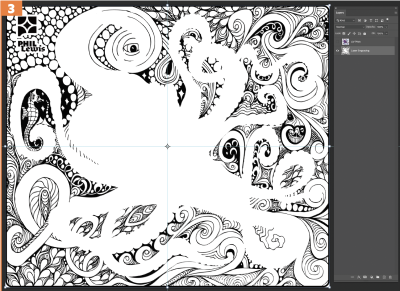
It’s vital that these can be completely separated. You’ll want the background of your printed layer to be transparent and the background of your engraving layer (where the printed layer actually goes) to be white.
Step 2: Getting the two layers to align
Open your artwork (Photoshop is recommended), and define the center point of the engraving layer relative to the printed layer.
In Photoshop, use the move tool. Select the engraving layer, with the “show transform controls” button checked. This brings up the center point of the engraving layer with some crosshairs on the screen.
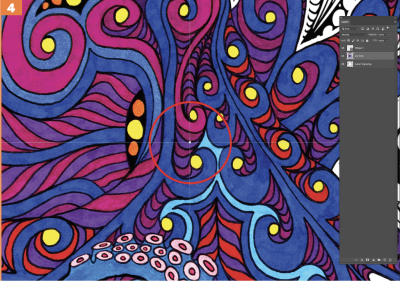
Drag some new guides to that center point. The next step is crucial: Make a mark on your printing layer right at that center point (Figure 4). I usually just make a small white dot. You can make this mark in any shape, size or color that you like—all that matters is that you know where it is and can see it on the physical print.
Worth noting: This center point may or may not be near the center of the printed layer. In this example, it is close to center, but with other jobs the center of the engraving layer is not aligned near the center of the printed layer. All that matters is that your center mark for the engraving layer is printed on the printed layer so you have a reference when aligning your laser.
Step 3: Saving your file
After you have your engraving layer center marked, you’ll want to save two files. First, save your “UV printing file.” For this step, delete the engraving layer, and save the file separately. A TIFF format is recommended, but anything with the transparency preserved will work.
Next, go back to the original layered file. This time, delete the printing layer. Save this as your “laser engraving file.” A JPG file is recommended, but pretty much any file type will work.
Once you have both files saved, it’s time to set up the jobs on both machines.
Step 4: Begin printing on your UV printer
In your printing software, open your “UV printing file” and bring it into your rotary printing environment. Important note: I always do the UV printing first. When attempting to align two jobs, I find it’s best to lay down the print and then engrave relative to it.
Beginning with the rotary calculations spreadsheet, you’ll want to enter the diameter of your bottle and the width of the artwork to get your Y-offset measurement. This is also a good moment to make sure the size of your file matches the size of the bottle you’re printing on. Keep in mind, if you change the size of your printing file, you’ll also need to change the size of your engraving file, usually by a percentage to ensure your files are the same size relative to the size that was created in the original files where the layers align.
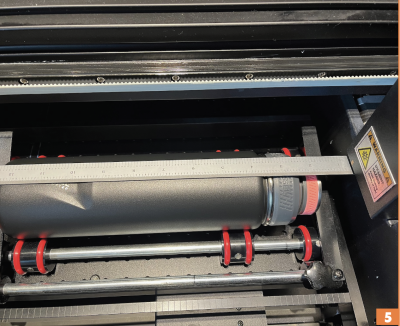
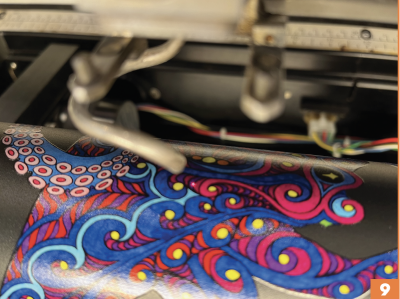
Once you have your Y-offset, place the bottle in the printer, focus the print head and then measure the X-offset. I place a ruler directly on the surface of the bottle (Figure 5) and measure out from the edge of the print head to where I want my printing job to begin.
Wipe down the bottle with alcohol and apply the adhesion promotor. In your print software, run the prints with seven layers, centering white/color/clear. I have found it’s best to use a clear coat on these because after you laser engrave through the powder coating on the bottle, you’re going to need to clean off the residue. By adding the clear coat, you’re protecting the ink from getting scrubbed off or diluted when you clean the laser engraving.
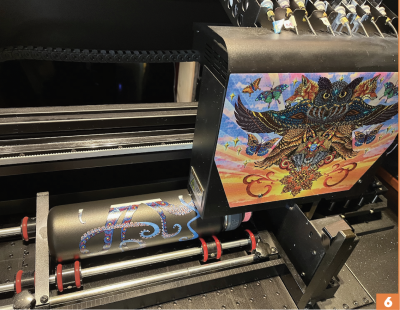
Once these steps are done, you’re ready to run your print job (Figure 6). If you look closely, you can see the white center/center alignment mark (small white dot) right in the middle of the print (Figure 7).
Step 5: Start engraving on your laser
Move your bottle to the laser. Run the job with the center-engraving>center/center option selected.
Side note: I have a 60-watt Helix laser, and I run these at 45 speed/100 power/600 DPI. I will also get as true to focus as possible.
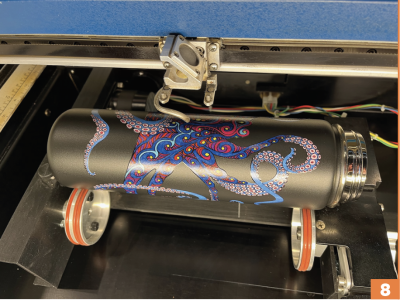
Once the bottle in the machine is focused (Figure 8), turn on the red dot pointer and set the home position. This is where the center reference mark comes in. Align your red dot pointer with the little white dot, and then set your home position there (Figure 9).
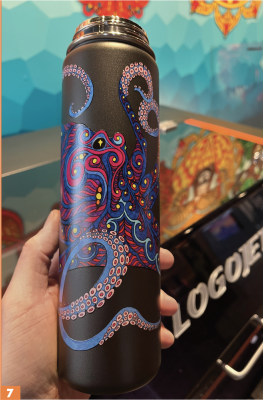
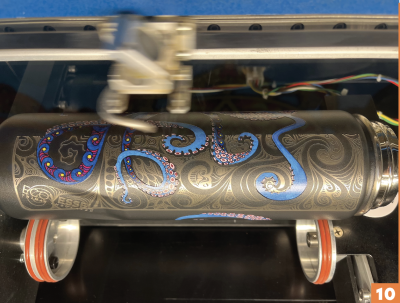
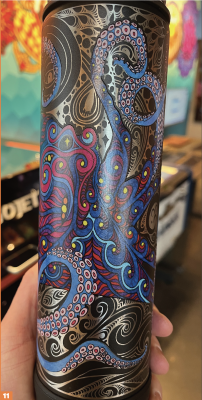
Now it’s time to run your engraving job. If you set up everything correctly, you should see the engraving going around your printed layer just like on the screen (Figure 10). Figure 11 highlights the finished product.
Hopefully that gives you some inspiration to try combining your UV printer and laser together. They are both super powerful and versatile machines. I absolutely love experimenting with them, and I can’t wait to see what comes next!
Read more articles about Laser