In all my 20-plus years as a graphic designer, I had never made or printed a bar code.
Creating Bar Codes and QR Codes
By Shon Roti, Sublimation Consultant, Graphic Designer
In all my 20-plus years as a graphic designer, I had never made or printed a bar code.
Ever.
I was unsure that the CorelDRAW-generated graphic produced for my client would scan correctly, if at all. But that was the task I was given this past summer by one of my favorite clients—a local museum gift shop.
As with all new and unfamiliar projects, there must be a first time.
When they asked me to produce a series of postcards with a UPC bar code printed at the bottom that would scan and “ring up” with a predetermined price, I kept asking myself, “Will this work?”
Prior to this project, I had worked with the museum, designing Art Deco-inspired posters and mugs depicting historic buildings located in downtown Sioux Falls, SD (my hometown) and surrounding areas. These designs, along with some historical photographs of the downtown the museum provided, would be the subject of these new postcards (FIGURE A).
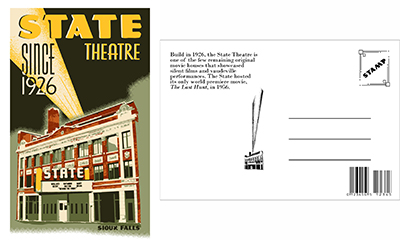
Figure A
When it came to selecting a program to create bar codes and QR codes, I was only vaguely aware that CorelDRAW, a program I use every day, had the necessary tools. Fortunately, it does, and they work great!
Yes, there are many online options to acquire these codes, but Corel had the ability—so why not use it?
The Bar Code Steps
The first step, I determined, was to find out what type of bar code would work with the museum’s scanners and create a prototype for the museum to test before I sent out for several thousand units to be printed.
Create a new document (Ctrl+N) in CorelDRAW and go to Object>Insert>Barcode to generate a bar code graphic (FIGURE B). The Barcode Wizard interface will populate in
the workspace (FIGURE C), and it is from here that the user can select the type of barcode needed and the numbers that correspond with the code. Click Next after selecting the appropriate barcode option, and other windows will follow (FIGURE D) that can be used to modify dimensions, resolution, and font characteristics. I made a sample of each bar code type and labeled them for the client.
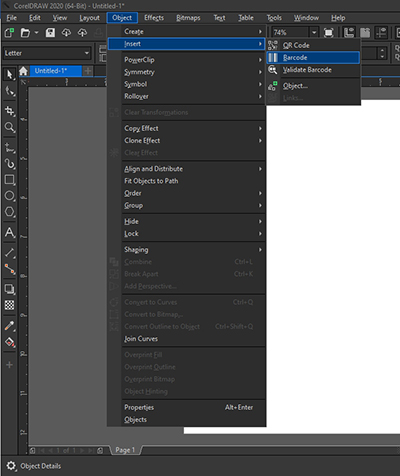
Figure B
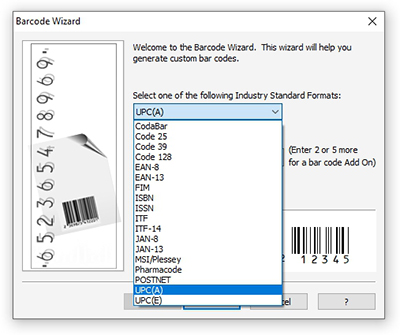
Figure C
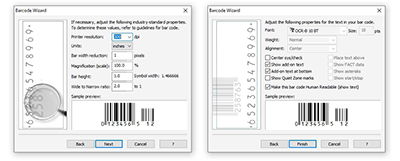
Figure D
The testing and programing phase had to be left to the retailer to noodle. This is the part of the process that I just had to be patient with, as I was of little use in this area because I had no retail experience and no programming skills.
After printing the codes and allowing the museum to test them, the museum determined the UPC(E) was the option that would work. And, as it turned out, the placeholder numbers I used in the samples also worked.
Thankfully, because barcodes are simple straight lines, the resolution can be quite low, and they will still perform well. Leaving nothing to chance, however, I decided to generate the codes using the default of 300 dpi.
Note: After generating the code, the size can be manipulated just like any other graphic or text using the anchor points to scale the graphic up or down. Editing the barcode is also a snap: Right click on the bar code and select Edit (FIGURE E). The Barcode Wizard will again appear in the workspace for adjustments.
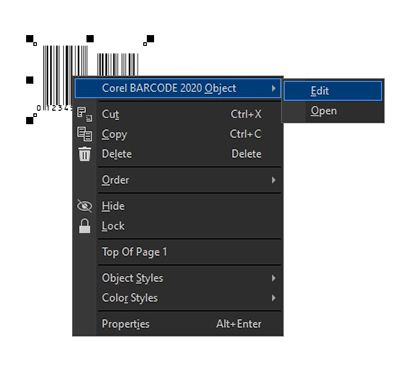
Figure E
Fun fact: According to Smithsonian magazine, the barcode was invented by Joe Woodland in an effort to speed up the checkout time at grocery stores. The addition of lasers and computers would make scanning groceries a reality in 1974.
The QR Code Steps
Like the barcode and postcard project, I learned through necessity. Tasked recently to design a door hanger using a QR code, I found that making one is just about a simple as it gets.
To create a QR code, create a new document and go to Object>Insert>QR Code. A QR graphic will be inserted into the workspace and a property bar will open (FIGURE F). Copy (Ctrl+C) the desired URL (web address) from the browser address bar and paste (Ctrl+V) that address into the URL menu field in the property bar in CorelDRAW. Then click the Validate button to link the graphic to the website. Done! Like the barcode graphic, this code can be scaled up or down using the anchor points and dragging to the desired size. It can also be rotated and still function perfectly.
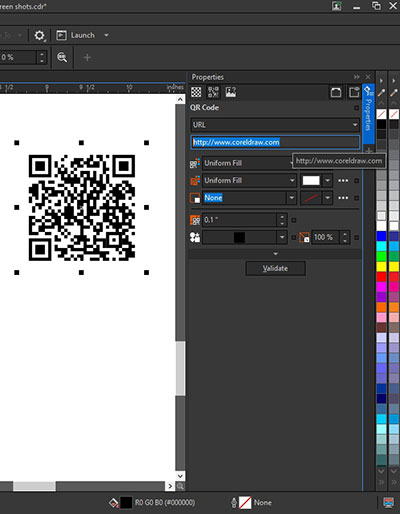
Figure F
The QR code also performs at very low resolution and size. My design (FIGURE G) used a QR code that is under 1 in. squared, and it worked beautifully with a smartphone camera or scanner app.

Figure G
Need to modify the code to a specific color and size? The fields located in the property bar allow for these changes
Fun fact: According to Britannica.com, a QR code is simply a graphic link to a website. It was created in Japan in 1994 by Masahiro Hara at Denso Wave to assist the auto industry. Short for quick response, the QR code design was modeled after the grid and playing pieces from the game “go.”
Barcodes and especially QR codes are becoming increasingly ubiquitous. Restaurants are using them in place of tangible menus. Street posters, ads, and retail packaging use them to deliver additional information about an event or product. Knowing how to create them will give you yet another tool to help you help your clients.
Scan the QR codes in FIGURE H for additional info about the bar code and QR code origins.
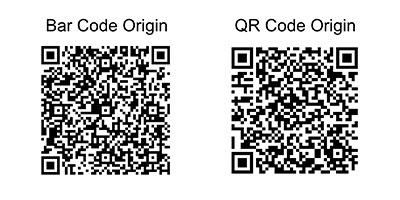
Figure H
More about the author: Shon Roti is the owner of 9th Street Designs, a sublimation & graphic design consulting & promotional products business. A graphic designer, Shon has spent more than two decades working as a production artist and instructor in the awards and promotional products industry. In 2014, ARA named him Speaker of the Year. You can find him at www.9thsd.com or contact him at shon@sublimationconsultant.com.