Laser mask is a solution for both laser engravers and sandcarving professionals, enabling users to laser cut masks and eliminating the inkjet media artwork and exposure process. With laser mask (Image 1), sandcarvers can go beyond the basics to stage-carve glass and crystal and deep-carve a variety of materials, including stone, ceramic, and wood.
Masking Works
Leverage Laser Mask for Effective Multistage and Deep Sandcarving
BY Mikaela Hernesman, IKONICS CORPORATION
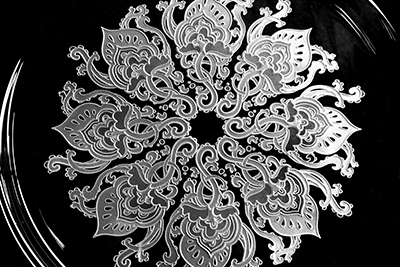
Laser mask is a solution for both laser engravers and sandcarving professionals, enabling users to laser cut masks and eliminating the inkjet media artwork and exposure process. With laser mask (Image 1), sandcarvers can go beyond the basics to stage-carve glass and crystal and deep-carve a variety of materials, including stone, ceramic, and wood.
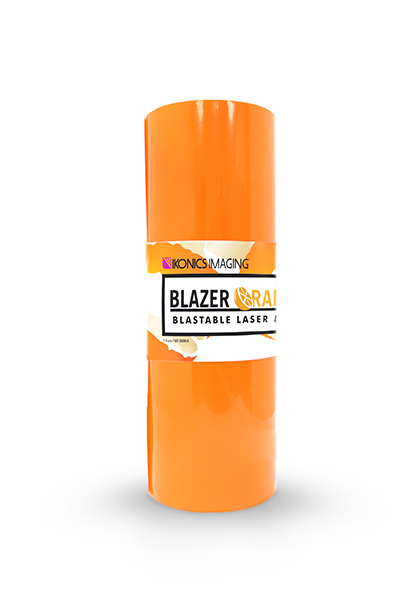
Image 1
Some personalization shops offer laser engraving only or only have a pressurized sandblast cabinet, but if you're lucky, you have both! Comments we often hear include "I have a laser engraver, so I can only surface etch" or "I have a sandcarver that I love, but I don't enjoy the exposure and washout process with photoresist."
SANDCARVING & LASERS
Entering the industry when I was hired by IKONICS was a whirlwind experience. I'd thought I would be answering the phone and filling orders, but I worked side by side with the renowned Dr. FineGrit, who you all know as Darin Jones. I craved to learn more about sandcarving and to be able to demonstrate all the different techniques out there. Darin is probably the most knowledgeable person I know when it comes to sandcarving, and he has always challenged me.
After falling in love with photoresist, I didn't understand the hype about lasers, until I saw the process in action. Confused at first, I wondered, "When do I expose the artwork?" And then it clicked. I'll never forget being at a trade show, talking with a Trotec Laser employee, thinking how easy the laser mask process is, and asking, "So why doesn't everyone have a sandcarving cabinet AND a laser engraver?"
Well, let's be real—the obvious reason is money. The costbenefit analysis is important, but future income from new capabilities needs to be considered, too. Many people who etch glass don't take advantage of all of the possibilities, many of which could significantly increase their return on investment. Many people who use photoresist and those who laser engrave onto glass only etch the surface. Laser mask can change that. By adding laser mask to your substrate in the lasering process, you can easily etch the surface and then bring it to the second step, your sandblast cabinet. In the second step, you can create two-stage or multistage carved images, with little increase to labor cost. Learning which areas to sandcarve first before peeling your next layer of the mask takes a little time (you need to understand how the image will look three-dimensionally), but once you've mastered that skill, you will be able to create complex work with high perceived value and appeal.
BEFORE YOU STAGE-CARVE
Stage-carving involves deep carving, not just surface etching. Deep carving is simple; you blast for a longer time. But be sure not to sandcarve more than half the thickness of your substrate. If you remove more than half of the thickness while sandcarving, your substrate can become fragile and weak, making it more likely to break while being decorated or used.
Stick to an appropriate blasting pressure that your mask will hold up to. Generally, the rule of thumb is 10 psi per 1 mil thickness of mask material. If I'm using 4-mil Blazer Orange Laser Mask, I'll deep carve at 40 psi. Always be sure to hold your nozzle perpendicular to and at least 4–6 in. away from the substrate surface. You do not want to burn your mask off by holding the nozzle too close.
In terms of multilevel stage carving, factors that must be considered include the design, "picking guide," and time spent sandcarving each layer, and I'll discuss all three in the next section.
STAGE-CARVING STEPS
Be sure your crystal or glass has adequate thickness. Thicker glass greatly enhances the sculpted design.
Typically, stage-carving looks best when looking through the glass from the noncarved side. This requires "backblasting." In some cases, you may need to mirror your image if it is being backblasted.
Make sure all lines in the design are closed and nothing is open-ended. This will make the carving process easy as you remove film during each sandcarving layer. The artwork design should have thinner lines; approximately 2-point lines would work well for the outlines.
Print your design on regular paper and number or color in each area to coordinate which layers will be sandcarved in a consecutive order (Image 2). This printed paper is your "picking guide." It will help keep you on track when you are sandblasting. To determine which area should be etched first, remember that the area you carve first will be the deepest carve of your image, and when looking at it from the noncarved side, that area will be the closest to you.

Image 2
Coloring books are a great guide to help with designing stagecarved artwork.
When sizing artwork, keep the size of your laser mask in mind. If you're planning to use laser mask, you'll need to size your art to be no bigger than the width of your roll—or order the roll size you need for your project. In my case, I use our company's Blazer Orange, so I have a lot of options. It's 4 mil thick, comes with or without a slip sheet, and is offered in 100-ft rolls in different widths (6 in., 12 in., 24 in., and 52 in.). Be aware that different manufacturers offer different standard sizes, and know what you have on hand and what you can order before planning a project.
Once your artwork is set up for your laser, the next step is applying the laser mask to your substrate. I applied Blazer Orange to a flat piece of glass for this project; if you're using a different laser mask, some steps may not apply to you. Apply it carefully and squeegee it down (Image 3), starting in the center of the mask. Remove the shiny carrier sheet (Image 4), and cut off any remaining mask from the edge of your substrate.
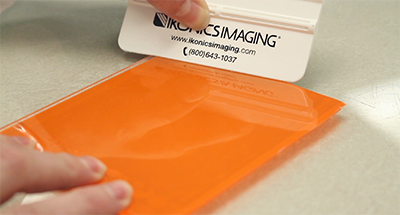
Image 3
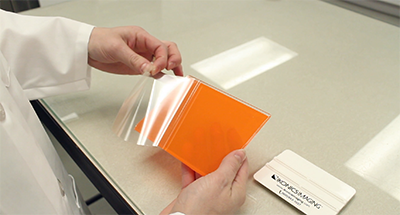
Image 4
For large substrates, use wide-format laser mask. That's why we offer rolls in a large variety of sizes. However, if the mask truly isn't wide enough for your substrate, you can tightly align more than one piece of mask next to one other, but do not overlap them.
Run your laser engraver to cut your design into the mask (Image 5) and then move your masked product to the sandcarver when it's done.
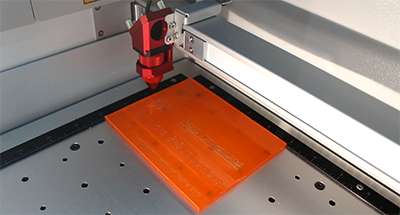
Image 5
Set your cabinet's pressure based on the thickness of your film using the same rule of thumb as deep carving (10 psi per 1 mil thickness). Because my Blazer Orange is 4 mil, I set my blast cabinet's pressure to 40–50 psi. Hold your nozzle perpendicular to and at least 4–6 in. away from the substrate surface.
You will etch off the entire outline first along with the largest picking area and sand-carve it up to about 3/8 in. deep (Image 6)—or as deep as you wish so long as it doesn't exceed half the thickness of the substrate. This will be easy to eyeball since stage-carving can only be done with glass or crystal and you can see through the sides and the front.
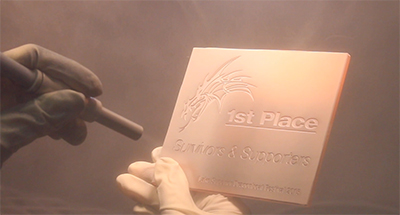
Image 6
Using a razor blade or X-ACTO-type knife, pick out the mask material of the next stage and sand-carve about ¼-in. deep. A good trick to measure depth is to use a Sharpie marker to mark your cutting tool at the 3⁄8 in., ¼ in., and 1⁄8 in. marks (and so on) to let you use your cutting tool as a ruler.
Repeating the same steps as stage 1 and 2, finish the rest of your layers by removing the mask material and carving at a lesser depth than the previous stage.
Your final stage will simply be a "shotgun" blast, which is more or less a light shading technique that does not carve depth at all.
The purpose is to distinguish the last layer from both the deep carves and the unetched glass or crystal. When you are blasting this last stage, hold the nozzle approximately 18 in. from the surface.
Peel away any remaining mask using your fingers or soak the glass or crystal in warm water for mask removal.
The finished piece (Image 7) will be stunning, elevating it from personalized to artistic. Beautifully finished stage-carved glass and crystal rightfully earn customers' attention, so be ready to produce more. Your laser engraver and sand-carving cabinet will pay for themselves in no time!
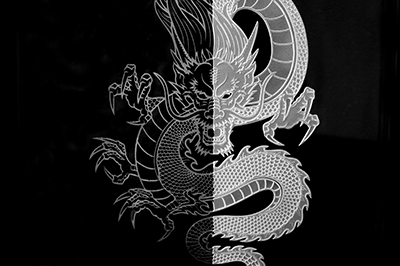
Image 7
Mikaela Hernesman has carried out many job functions at IKONICS Corporation, including trade show coordinator and inside sales. Most recently, she was promoted to marketing manager for the Duluth, MN-based imaging technology company. When she's not too busy producing digital marketing content, making videos, and growing the IKONICS brand, she's hanging with her family and three dogs. Learn more about IKONICS Imaging's sandcarving equipment, supplies, and glassware at IkonicsImaging.com.