Learn how to sublimate fishing lures like a pro from Johnson Plastics (from the February 2015 issue of Rec Review)
All About That Bass with a Treble Hook
 Hooked On Sublimation
Rodger Vieau
Johnson Plastics’ Rodger Vieau gives step by step instructions for sublimating a fishing lure.
Mix work and play with fishing lures that can be sublimated with promotional messages to keep your clients’ names in front of their customers. Johnson Plastics recently added a larger lure (4 ½ in.) To join the smaller size (3 ½ in.). These lures are 100% functional spoons with treble hooks attached via split rings. (Because the hooks are sharp enough to secure a prize catch, each comes with a clear case to protect your hands, your clients’, and his customers’.) The lure is attractive to fish because its concave shape makes it twist in the water. The silver sparkle and white sparkle options reflect light, mimicking prey fish. Sublimating vibrant colors on the white lure similarly attracts your prey. Because these lures are sublimated, creating one-off custom versions is no problem. That means they can be marketed as gifts for anglers.
 The graphic determines whether you use the basic or advanced method of sublimating the lure. A promotional message with a logo but no background, for instance, can be done with the basic method. A full-bleed graphic—one that will cover the entire surface of the lure—will require a little more work with the advanced method.
The image you are sublimating can help you choose which lure you should use. The sparkles on the silver sparkle and white sparkle lures will show through sublimated images, adding a nice touch, but the white lure will show off the image quality the best. Dark, basic logos or graphics will show up best on the silver sparkle lure.
In addition to your sublimation printer, heat press, and graphics software, you’ll need:
- Heat tape
- Repositionable adhesive spray
- Soft, heat-conductive pad
- Needlenose pliers
 Download the template for the fishing lure from www.Dyesublimation.com/sublimationtemplates.html, choosing the file type (EPS or CDR) based on which graphics software you’ll use.
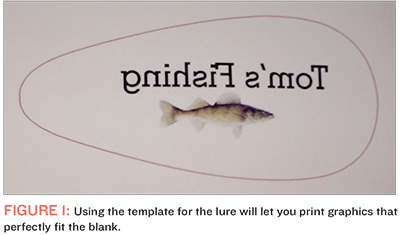
- Use the template to design your image and print it out on sublimation paper. We suggest using TextPrint® R or a similar paper (FIGURE 1).
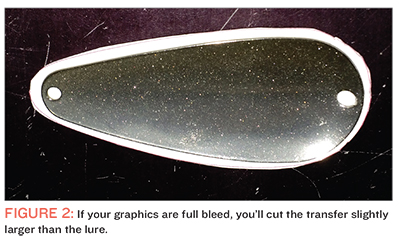
- Cut out the printed transfer. With the basic method, which can be used as long as the image isn’t full bleed, you can cut the transfer out as a rectangle larger than the lure. If your image is a full bleed, with color extending all the way to the edge of the lure, you’ll use the advanced method and do a perimeter cut, cutting the image out just outside the template outline (FIGURE 2).
- Attach the cutout transfer to your lure using the basic method or the advanced method, based on the type of art you are using.
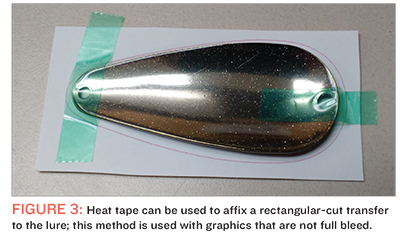
Basic method: If you used Sublijet® R or a similar paper and are using the basic method that allowed you to cut your image out as a rectangle, you’ll affix it to the lure using heat tape (FIGURE 3).
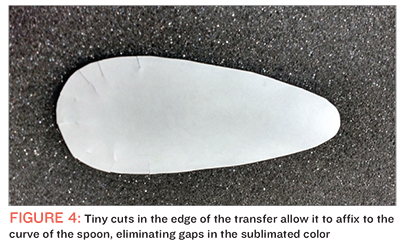 Advanced method: If you used JP Sublimation Paper or you are doing the advanced method with a perimeter-cut, full-bleed image, you’ll use a repositionable adhesive spray such as Elmer’s Repositionable Mounting Spray to adhere the transfer to the lure. To sublimate the full-bleed image on the lure, it helps to create some tiny splice cuts around the transfer. The cuts, made perpendicular to the edge of the template, will allow the paper to overlap slightly to adhere to the curved edges. Press down any ridges in the transfer to obtain a full bleed without color gaps. Use the adhesive spray for this method. Your transfer should be adhered to the lure with tiny overlaps in the paper around the curved edge as shown in FIGURE 4.
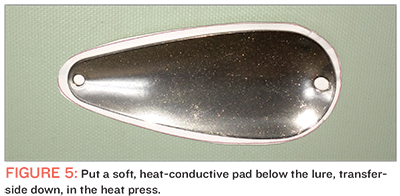
- Place a soft, heat-conductive pad—such as a silicone rubber pad that’s at least 1/8-in. Thick or the Johnson Plastics white silicone pad folded in half—on your press and place the lure facedown on top of it as shown in FIGURE 5.
- Preheat your press to 375 degrees and set the pressure to heavy. Close the press. Sublimate the 3-in. Lure for 3½ minutes and the 4½-in. Lure for 5 minutes. Cover with a sheet of plain paper.
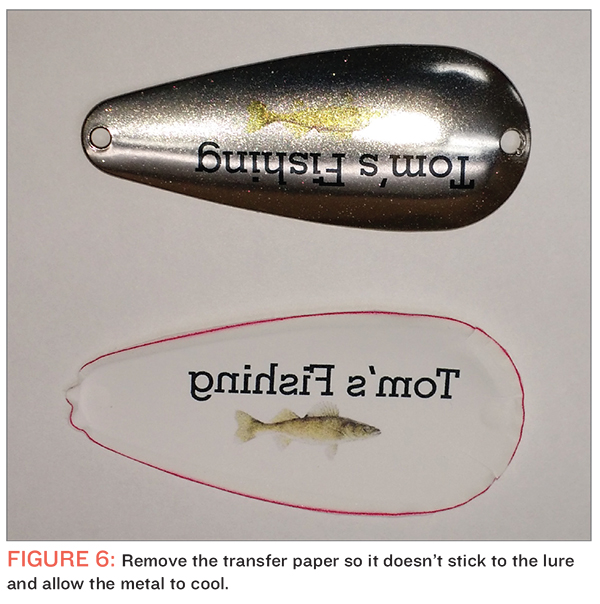
- Open the press, and use heat gloves to remove the paper transfer immediately so that it doesn’t stick to the lure (FIGURE 6). Allow the lure to cool.
 Use a small needlenose pliers to attach the split ring and treble hook to the cooled lure as shown on the first page of this article.
- Deliver the lure to your happy customer or, if you’re doing this one for yourself, hang the “Gone fishing” sign and head to your favorite lake!
Rodger Vieau, Johnson Plastics’ manager of technical support, has been in the industry for more than 30 years and involved in sublimation at the Minneapolis, MN-based company for the past 15 years. Johnson Plastics has sublimation specialists on staff and has become one of the largest sublimation distributors in the country. The company sells everything from the small desktop Ricoh printers to the wide format Epson, and Mutoh printers. They have nine distribution centers across the country. Visit www.johnsonplastics.com for all of your sublimation and engraving needs.