I would have to look back to a class I took in high school to point to my first experience with glass etching. My instructor, Mr. Siska, introduced me and several other sophomores to the process in his art class. It was one of the projects that I remember well and has stuck with me despite the 23-year absence from the process. It seems fitting that my career now finds me back to glass etching again—a technique that has changed little since 1987.
Acid Etching Wine Glasses for Your Customers
By Shon Roti
I would have to look back to a class I took in high school to point to my first experience with glass etching. My instructor, Mr. Siska, introduced me and several other sophomores to the process in his art class. It was one of the projects that I remember well and has stuck with me despite the 23-year absence from the process. It seems fitting that my career now finds me back to glass etching again—a technique that has changed little since 1987.
As the owner of a small promotional products business entering its second year, I’m often challenged by my clients to find or produce items that require equipment that is not yet a part of my repertoire. In those cases, I would typically utilize my promotional product subscription to find a wholesaler to produce products I cannot produce myself. But occasionally, a job presents itself that gives me an opportunity to expand my range of abilities and produce the item in-house.
So, when a client (owner of a local wine bar and eatery) asked if I could etch some Riedel wine glasses to sell in the restaurant, I was instantly transported back to Mr. Siska’s class. And despite not yet having a sandcarving system, I was able to confidently say “yes” to the order.
In this tutorial, I will demonstrate the supplies needed, the equipment used, and the techniques employed to help produce these glasses (FIGURE A).
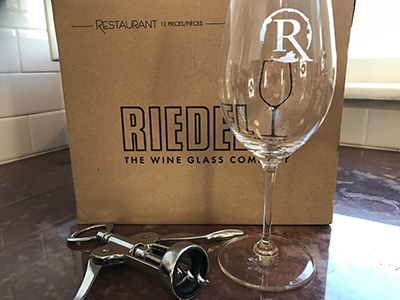
FIGURE A
My first step was to order the etching cream. Etching creams are still commonly used and can be found at your local hobby shop.
The most technically difficult part of the process is creating the mask. More on that in a moment. FIGURE B illustrates the small number of tools and supplies needed for this operation—etching cream, rubber gloves, a small art brush, weeding tools, squeegee, and acetone.
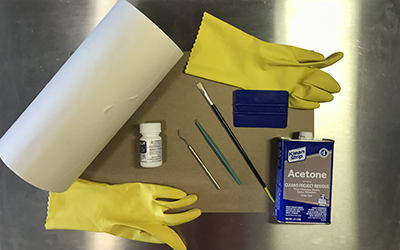
FIGURE B
A Note About the Supplies
The etching cream ingredients may contain ammonium/sodium bifluorides or other chemicals that need to be respected. The workspace should be well ventilated to prevent inhaling any fumes.
Acetone will be used to clean the surface of the glass where the etching is to occur. Alcohol or lighter fluid can work as a substitute.
Laser masking tape will be used to expose only those areas needing to be etched while protecting the surrounding areas.
Rubber gloves are needed to prevent the etching cream from making contact with the skin. Read the directions carefully to avoid chemical burns.
An art brush works well to apply the cream to the product, and the squeegee helps minimize gaps and wrinkles in the mask that can distort the etching.
Weeding tools will be used to remove the masking to create the art space for the etching cream.
Convenient access to a sink is also important. There is a time factor that will be important to follow. Having the product near a water faucet will be helpful.
Creating the Mask
A mask could be created several ways, utilizing sandcarving films, vinyl transfer tape, or laser tape in accord with the corresponding equipment (i.e., sandcarver, vinyl cutter, or laser engraver). I did not have a sandcarver, so the film option seemed moot.
Although I do have a vinyl cutter, I believe that using the laser to be the more efficient option. A time study might have to be done to prove that theory.
After cleaning the glass with acetone, the glass is ready for the mask.
One of the benefits of acid glass etching is not having to cover and protect the entire product. A small piece of laser tape can be cut or torn to a slightly larger size than the artwork and then applied (FIGURE C).
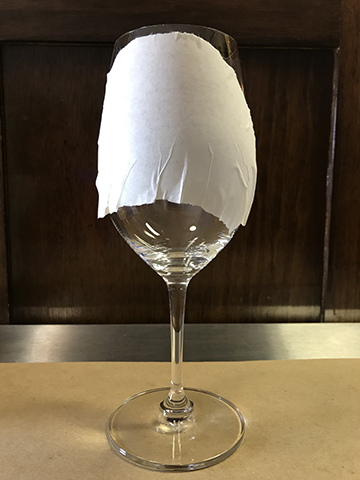
FIGURE C
Use the squeegee to push air bubbles and wrinkles away from the imprint area. Do not rush this step. Any areas not sufficiently squeegeed can find acid reaching unwanted areas.
The Riedel glasses, like other wine glasses, have a complex curve. The glass is tapered to a narrow opening from the bowl-shaped lower portion. Wrinkles will be difficult to avoid in the transition areas. Make sure that the artwork is sized and positioned on the glass to avoid these difficult areas.
Note: I could have used my laser to imprint the Reidel glasses; however, in my experience, I have found the laser tends to fracture the glass, leaving a rougher finish. Even with laser tape designed to reduce the fracturing, the finish will not feel as smooth to the touch, nor will it be as opaque as acid glass etching or sandcarving. In this operation, a laser will only be used to cut the masking on the glass.
Cutting the Mask
As mentioned above, the laser was used to cut the masking only, not to laser imprint the entire artwork.
After setting up the vector artwork in CorelDraw (FIGURE D), I applied laser tape to a few test products (glasses from the kitchen cupboard) and modified the laser’s settings to “kiss cut” the masking. Ideally, the laser settings should be powerful enough to penetrate the masking without marking the glass significantly. With my 30-watt laser, I landed on a medium speed, a low power, and a low frequency (around 500 Hz).
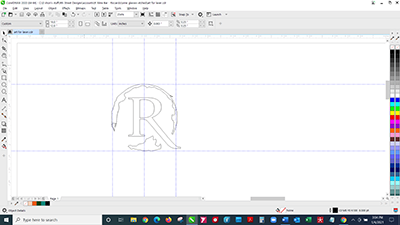
FIGURE D
Lasering a tapered glass in the laser requires some planning—specifically creating a jig to hold the glass in position so that the imprint area is secured, level, and square. Jigs can be highly engineered creations, or they can be as crude looking as the one I use (FIGURE E). This jig was created using old wine corks to position and hold the product, scrap acrylic as an elevation adjustment (cut with the laser) and a piece of scrap aluminum for the base. These elements are all held together using double-sided trophy tape and rubber cement. Not pretty, but very effective.
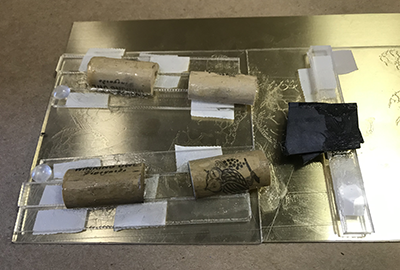
FIGURE E
Note: Rubber cement not only works as a good adhesive, but it also provides a grippy surface on the corks, helping to prevent the product from sliding out of position.
After lasering all the glasses, I used a weeding tool to carefully remove pieces of the laser masking tape (FIGURE F). For reasons I’ll explain momentarily, I would recommend lasering and weeding all of the glasses first before moving to the next step: applying the acid etching cream.
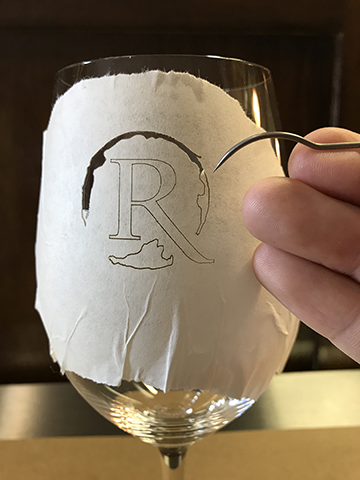
FIGURE F
Acid Cream Application
There are only a couple of recommendations that I will pass along for this step: apply liberally and wear gloves. By liberally, I mean apply until the cream is heaped onto the open areas so that the glass is completely covered and made opaque by the cream (FIGURE G). The manufacturer of the acid cream I used recommended the cream be applied for 1 minute, but I found that 4 to 5 minutes provided better results.
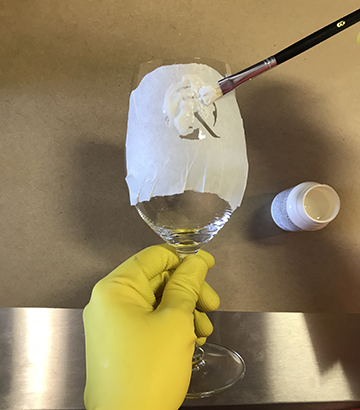
FIGURE G
Having the glasses prepped (glasses lasered, weeded, and ready for the cream) allowed me to minimize my time at the sink. Lasering, weeding, and etching the glasses individually could easily add an additional hour for a dozen glasses.
The moment I started applying the cream, I set a timer for 5 minutes. Once the timer went off, I started rinsing the glasses (FIGURE H). I found that I was able to finish applying the cream to a dozen glasses in about 5 minutes.
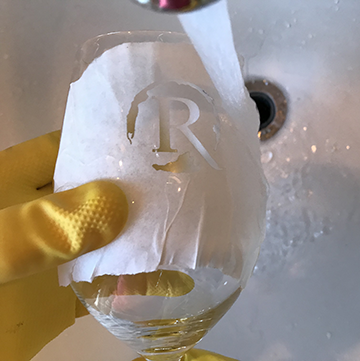
FIGURE H
While rinsing the glasses, I removed the laser masking at the same time. Using a clean terry cloth towel, I dried the glasses to prevent water spots.
Production Time Per Each Step
Cleaning the glasses: 15 minutes per dozen glasses
Mask application: 1 minute per glass
Lasering: 10 seconds per glass
Weeding: 1 minute per glass
Etching cream application and wait time: 4 to 6 minutes per dozen glasses
Rinsing/cleaning: 20 minutes per dozen
Final Thoughts
Being able to produce more of the products I sell in-house allows me to control the production and production time, cut shipping costs, and best of all, capture more margin for my products and services.
Acid etching glass was a simple process that I will be employing in the future when the opportunity comes again, and I credit my high school art teacher, Mr. Siska, for bridging the educational gap for me to have considered attempting it in the first place.
More about the author: Shon Roti is the owner of 9th Street Designs, a sublimation & graphic design consulting & promotional products business. A graphic designer, Shon has spent more than two decades working as a production artist and instructor in the awards and promotional products industry. In 2014, ARA named him Speaker of the Year. You can find him at www.9thsd.com or contact him at shon@sublimationconsultant.com.