Whether it’s to show school spirit or keep warm against a winter chill, few apparel items are as popular as the fleece jacket. But with this versatile fabric, jackets are only the beginning. Fleece can be used to make everything from slipper socks and mittens to blankets, dog toys, and heating pad covers. Regardless of how you use it, knowing how to personalize fleece—without jeopardizing the integrity of the fabric—is a useful skill for any retailer looking to add more apparel to their product offerings.
Fun with Fleece
How to Personalize Fabulous Fleece Finds for Any Event or Order
Ben Sieber, Marketing project manager, Epilog Laser
Whether it’s to show school spirit or keep warm against a winter chill, few apparel items are as popular as the fleece jacket. But with this versatile fabric, jackets are only the beginning. Fleece can be used to make everything from slipper socks and mittens to blankets, dog toys, and heating pad covers. Regardless of how you use it, knowing how to personalize fleece—without jeopardizing the integrity of the fabric—is a useful skill for any retailer looking to add more apparel to their product offerings.
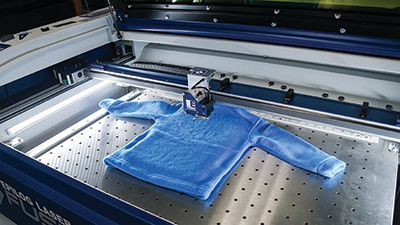
To begin, you’ll need a fleece jacket—I found the child-sized one shown in this tutorial online—and a laser engraver. For this project, I used Epilog’s 75-watt Fusion M2.
Step One
Once you’ve finalized your design and are ready to start engraving, adjust your print settings according to your laser engraver’s wattage. If you’re unsure which settings would be best, ask your laser’s manufacturer for guidance. Then, select “center engraving” in the driver and Jarvis for the dithering pattern.
For a better final result, I suggest designing the graphics with an 80% gray fill. This will separate out the dots in the image and result in less fabric being removed during the engraving, which helps protect the integrity of the fabric—and keep the customer warm while they’re wearing it!
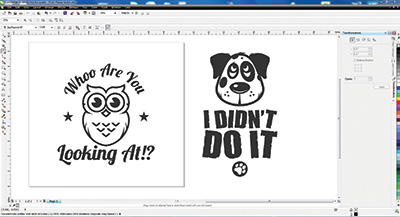
Using an 80% gray fill, as shown above, will help separate out the individual dots in the image, resulting in less fabric being removed during lasering.
Step Two
Before you begin engraving, insert a flat, rigid object, such as a piece of scrap acrylic, into the jacket to ensure the material stays flat and level throughout the process. Place the jacket in the center of your engraving area; you might need to do some measurements to find the right spot. If you have an Epilog Red Dot Pointer, use it to locate the exact center of the jacket and set it as the home position. If you don’t have a pointer, you can break out a trusty ruler or measuring tape to find the center, instead.
A red dot pointer also can be a handy tool to determine your precise engraving area. Before you begin, set up a vector box outside of your graphic and print it to the laser in vector mode. Then, run the job—with the laser door open so the laser won’t fire—and use the red dot pointer to see exactly where the engraving is going to appear on your fleece.
Step Three
When engraving fabrics and textiles, I generally recommend reducing the DPI at 300 or less to prevent scorching or burning entirely through the product. I also recommend starting at a high speed, such as 90% to 100%, and a low power, such as 10% to 20%, then adjust based on your results. This will require a few scrap pieces, but will help you determine the most efficient and effective process, helping you save time on each and every apparel order.
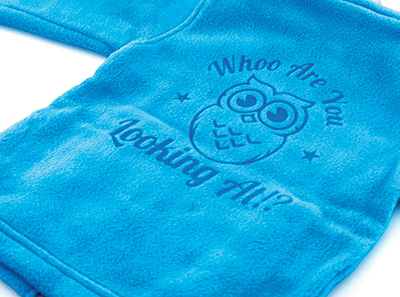
The end result is a bold image that maintains the integrity of the fabric, ensuring customers stay stylish and warm.
To learn more about this project and download templates, visit Epilog’s Sample Club at www.epiloglaser.com/resources/sample-club/fleece-jacket.htm.
Ben Sieber is the marketing project manager at Epilog Laser. He received his bachelor’s degree in graphic design as well as an associate’s degree in fine arts. For the past 13 years at Epilog, Sieber has been a driving force behind the company’s branding, website, advertising/marketing collateral, and much more. He’s also spent a great deal of hands-on time with the laser, working with various materials and developing monthly Sample Club projects.