Sandcarving is a quick, clean, and simple process that will diversify any business. Sandcarving not only allows for deep
etching capabilities with sharp, clean lines, but it also offers techniques unique to sandcarving that will increase the value
of any project. These techniques include halftone, or photographic etching, frosting capabilities, complex curves, and the
popular multistage carving capability!
Master the Sandcarving 2-Step
Simplified Stagecarving? Yes, it's Possible!
By Darin Jones, Ikonics Imaging
Sandcarving is a quick, clean, and simple process that will diversify any business. Sandcarving not only allows for deep
etching capabilities with sharp, clean lines, but it also offers techniques unique to sandcarving that will increase the value
of any project. These techniques include halftone, or photographic etching, frosting capabilities, complex curves, and the
popular multistage carving capability!
Focusing on multistage carving, there’s a very simple, two-stage sandcarving process. To further simplify the procedure, we’re
using RapidMask, the only dry-process film on the market, which saves even more time and resources.
The simple steps below prove how quickly and easily a two-stage carve can be achieved on glass—and you’ll be amazed at how
one easy technique can increase the value of any project.
1. Generating Artwork
When it comes to any sandcarving process, optimum end results truly stem from great and accurate artwork. When working
with RapidMask and sandcarving, there are a couple important steps that MUST be addressed when creating artwork:
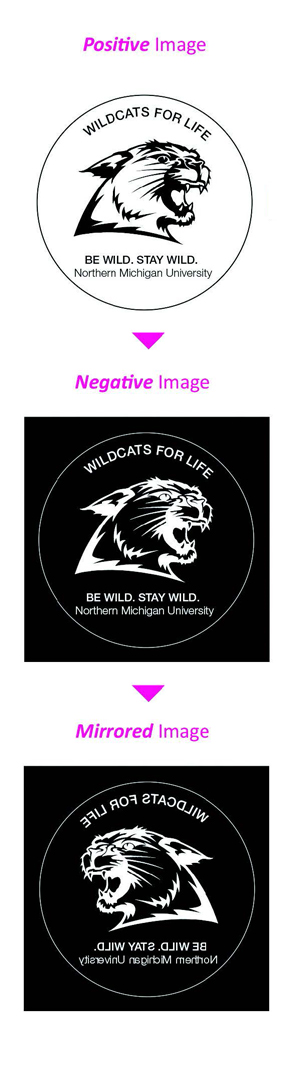
- Ensure the artwork is in a “negative” format. Because RapidMask is a dry-process film, the artwork must be inverted to
a negative image. Simply start creating artwork in a “positive image” format and then invert to a negative image. Once
inverted, view the artwork as the “white/clear areas = blast”! Those areas will be sandcarved and removed from the
substrate.
- If the artwork needs to be set up as a back blast, or the substrate is being sandcarved from the back side, simply mirror
the image.
- Ensure artwork is setup for a two-stage carve. There should be distinct or enclosed “islands” within the artwork. “Cut
lines” may need to be added to ensure an easy stagecarve or film removal process. Also, wide lines will help to achieve a
deep Stage One blast, which will create more separation and pop.
Before going to print, make sure the black areas are 100% black or “K” in the CMYK spectrum and the white areas are
100% white. This is extremely important because ensuring proper color levels will eliminate bad artwork prints and
prevent the film from being exposed improperly. When going to print, ensure the printing preferences are set for the
darkest, or high density, output.
2. Exposing Artwork
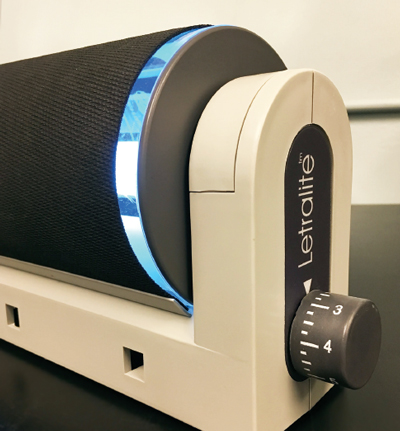
After the artwork is printed onto inkjet or laser
media, it’s time for exposure. We’re using the 4 mil
thickness for a deeper etch. When exposing the
artwork, make sure the artwork and RapidMask are
placed emulsion-to-emulsion. The UV light passes
through the artwork first, exposing the image onto
the film. Because we’re using RapidMask 4 mil film,
we’ll expose it between 2–2.5 minutes on a Letralite
or standard UV unit. If you’re using any other type
of UV exposure unit, a simple “snap test” can be
performed. The snap test ensures the exposed mask
is brittle enough for sandcarving.
If you’re using a different photomask, you’ll need to
wash out the film. We’re skipping that step because
we’re using a dry-process film.
3. Put Photoresist on Substrate
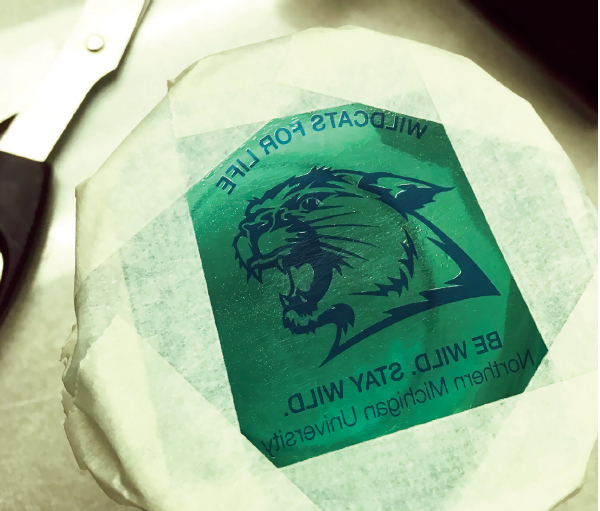
After the substrate is cleaned,
apply the repositionable film to
the substrate, sticky side down. A
squeegee can be utilized to apply
pressure, remove air bubbles, and
adhere the film to the substrate.
Then, simply remove the film
carrier and tape off any areas of the
substrate that need to be protected.
4. Stage one Sandcarve
After the sandcarving system is turned on and the pressure is adjusted to 40 PSI, load the substrate into the cabinet. This is
the Stage One sandcarve, the deepest carve. Thoroughly blast the entire substrate, achieving an approximate depth of ⅛ in.
deep or as deep as the line is wide. Keep the nozzle about 4–6 in. away from the substrate at a 90-degree angle. This step will
achieve the deepest etch, so keep the nozzle moving on the substrate until the desired blast depth is achieved while ensuring
the film is not compromised.
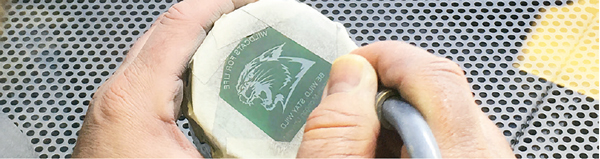
5. Remove Unwanted Photoresist
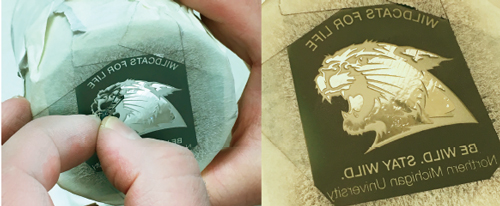
When Stage One is done, remove
the substrate from the sandcarving
cabinet. In preparation for the Stage
Two carve, peel away sections of the
remaining photoresist film. A picking
tool, razor, or even your fingernail can
help with the photoresist film removal
process.
6. Stage Two Sandcarve
The Stage Two carve can
be considered a “shotgun
blast.” The cabinet
pressure should remain
at 40 PSI. Keep 12–18 in.
between the nozzle and
the substrate; the nozzle
would be approximately at
the back of the cabinet. Be
sure the nozzle is aimed
straight at the substrate.
The shotgun blast is very
quick and simple, lasting
only a couple of seconds, to
achieve a surface etch.
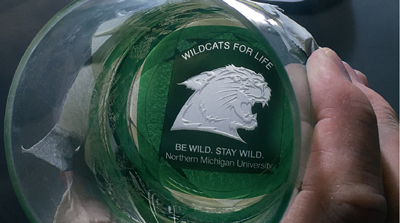
Show Off the Finished Product
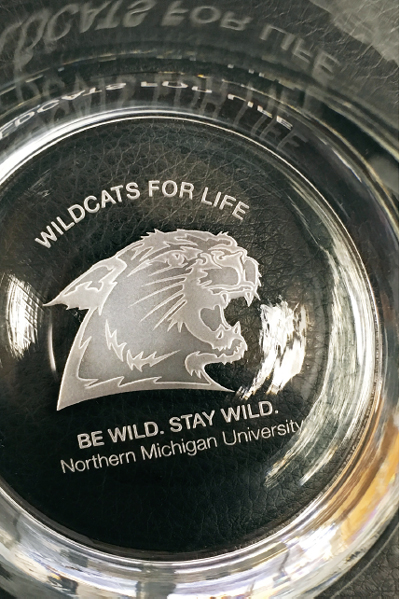
Remove the entire stencil. Use warm water if needed.
Then, show off your two-step stagecarved product! This
streamlined process saves you time and labor while
creating a high-end look that will provide customers with a
variety of highly valued products
Darin Jones has been with IKONICS Imaging
for more than 13 years. As the company’s
technical training sales specialist, Jones
teaches sandcarving seminars around the
world. He holds a degree in communications
from the University of Minnesota, Duluth.
IKONICS Imaging is a “total solution”
supplier for quality sandcarving equipment
and products. Go to www.ikonicsimaging.com
to find everything you need to start and maintain your own
sandcarving business, including photoresist films, sandcarving
equipment and supplies, glass and crystal engraving products, and
training resources.