Achieving vibrant, accurate sublimation prints relies heavily on how you prepare your design workspace. CorelDRAW is a powerful tool for this process, but the default settings are not fully optimized for sublimation when installed.
Minor adjustments to your layout habits, color settings, and workflow make a significant difference between a dull print and a crisp, professional product.
This guide outlines shortcuts, color management, and smart printing workarounds to maximize your efficiency and output quality in CorelDRAW.
Shortcut Keys
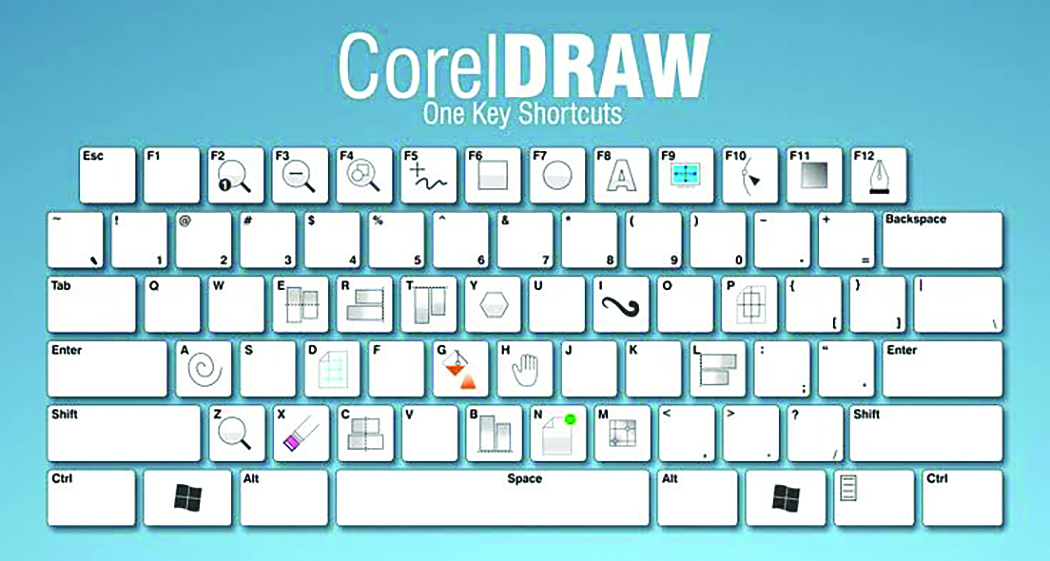
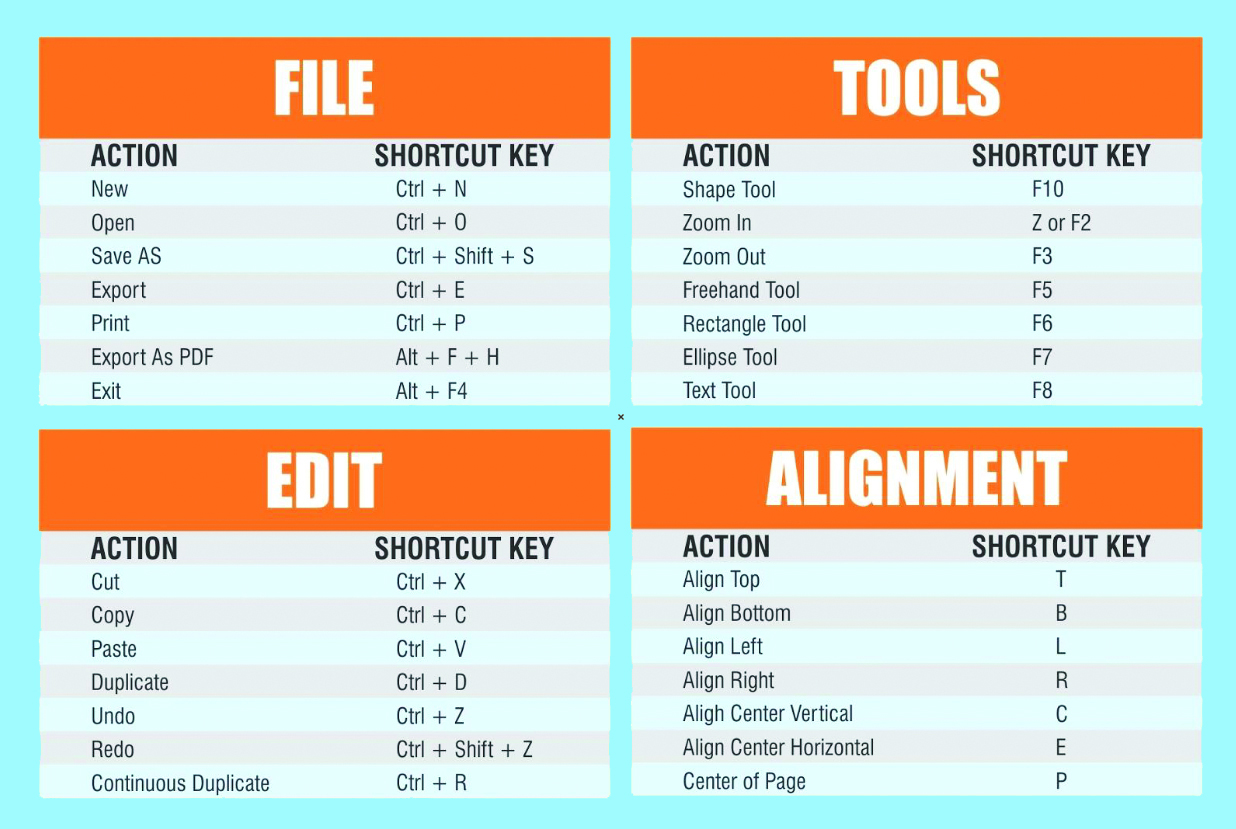
Time Saved per Action: Studies have shown that selecting a tool on a sidebar menu or drop-down takes anywhere from two to five seconds. Using a hotkey can bring that time down to less than a second. This may not seem like much time, but overall, it could save you about 50 hours a year for average computer users. Familiarize yourself with some of the hotkeys shown in figures A and B to save you time during your daily routines.
Essential Color Management
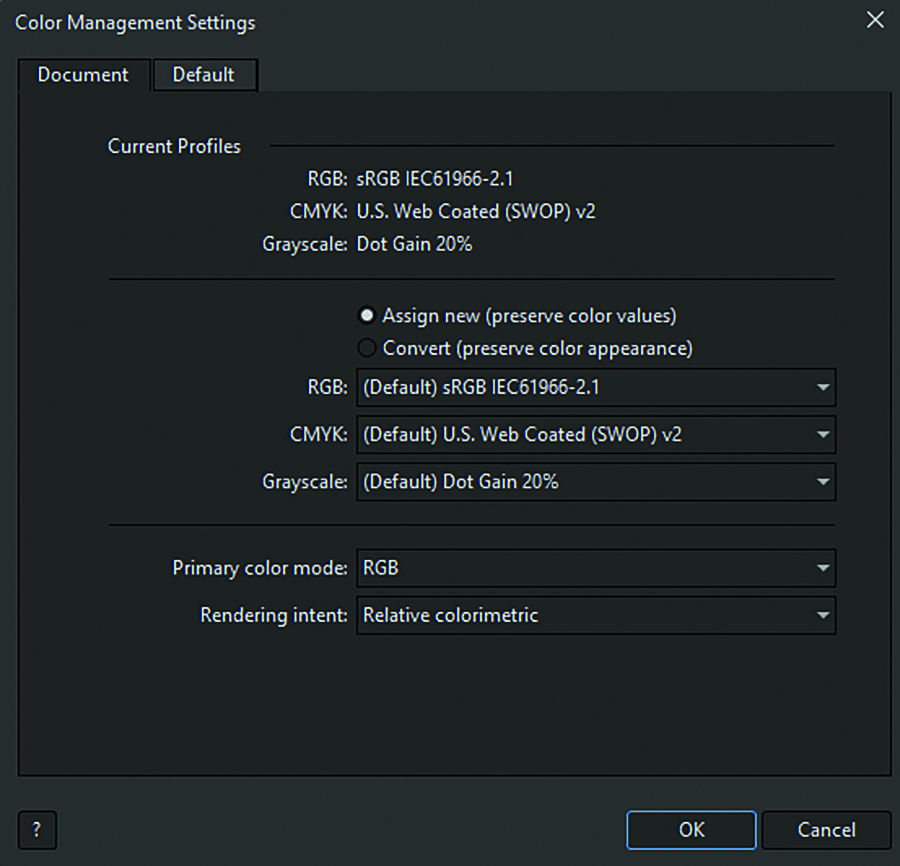
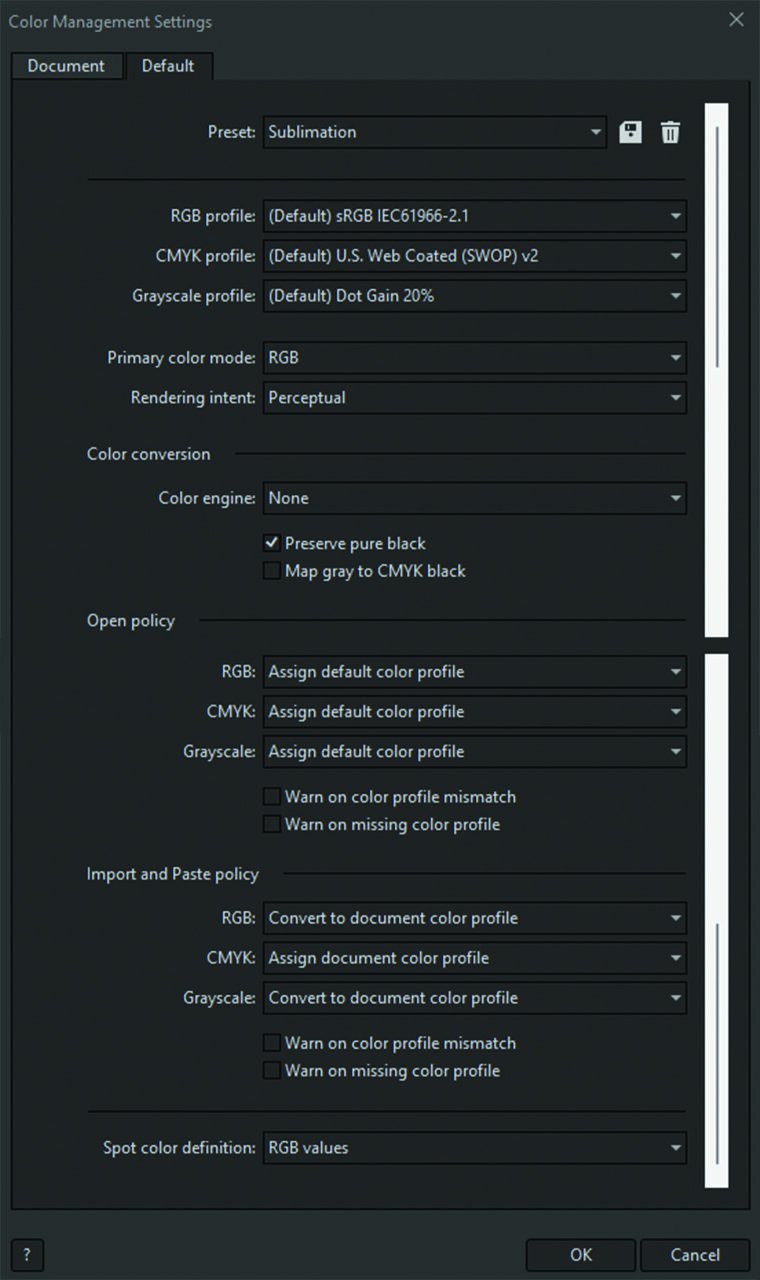
- RGB Workspace: CorelDRAW defaults to CMYK, but sublimation inks and standard printers process colors best in RGB.
Ensuring your program’s color management and documents are set to RGB will yield vibrant color output.
To change these settings, go to Tools > Color Management (figures C and D).
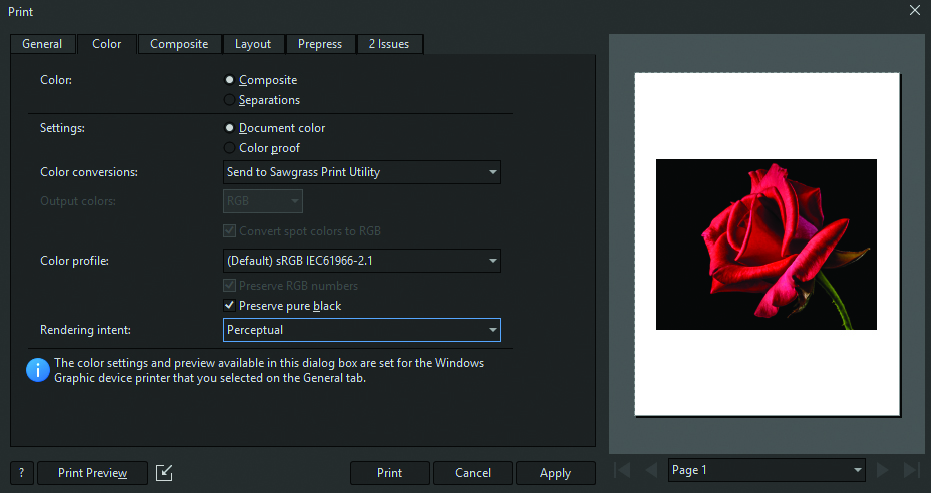
- ICC profiles: ICC profiles are key to a constant, correct color output. ICC profiles typically come from the printer manufacturer or ink supplier (e.g., the Sawgrass Print Utility program or Epson Edge Print PRO).
Change settings in File > Print > Color tab (figure E).
Smart Printing Work-Arounds
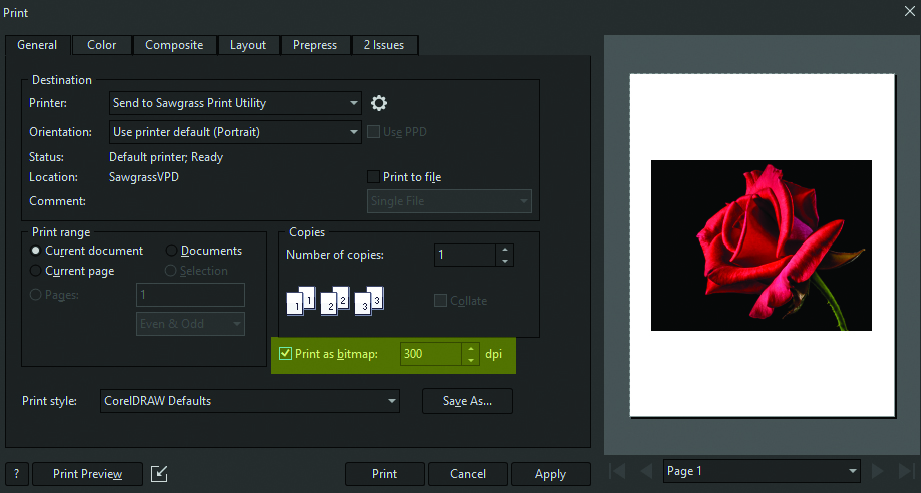
- Print as Bitmap: If the software is running slowly or you are missing information in your design when it prints, convert your file using the bitmap features.
With this approach, you will be able to flatten your vector graphic into a bitmap format, which will make the program or print feature run more smoothly. To find this process, go to File > Print, select Print as Bitmap, and send it to your printer.
This method forces CorelDRAW to flatten your complex vectors for your printer (figure F).
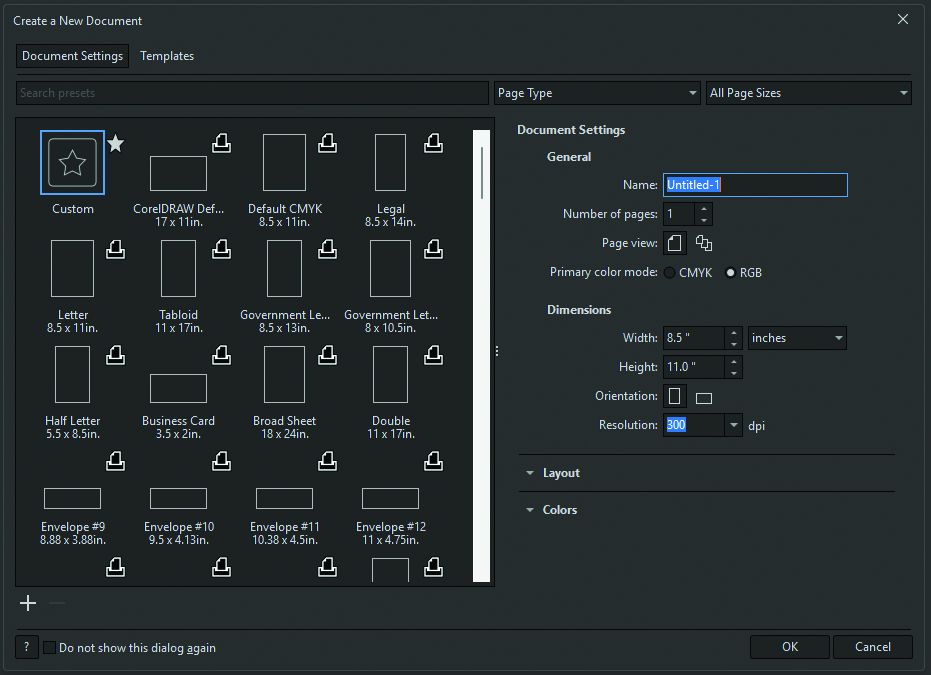
- Custom Page Sizes: Creating and saving custom page sizes to your presets enables you to quickly align multiple designs on a single sheet of sublimation paper. To set the page size, go to Layout > Page setup, then enable the Page Size option. From there, choose Custom size and manually enter width and height (figure G).
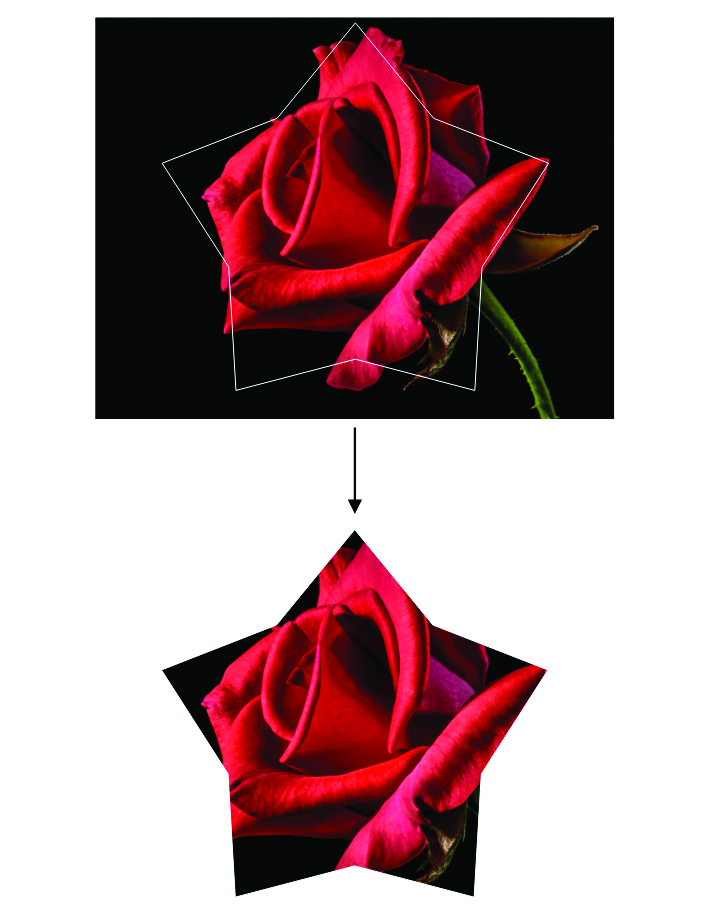
- PowerClip: Use less ink with the PowerClip feature. This option lets you place bitmaps or vectors inside other objects. It is typically used for trimming artwork to a specific shape, placing photos into text, and creating complex layouts.
To use this feature, select your artwork and click Object > PowerClip > Place Inside Frame.
Then, click within the shape where you would like the PowerClip placed (figure H).
Mastering these CorelDRAW tips will significantly reduce your production time and eliminate printing errors. By using shortcut keys and essential color management and leveraging printing workarounds, you enhance your time efficiency and protect both ink and supply materials from waste.
Implement these tips into your daily design workflow to ensure consistent, professional sublimation results every time.